Complete the following procedure to create a data linkage between ClassPad.net and your electronic dictionary.
Procedure on the Electronic Dictionary
↓
Procedures on the ClassPad.net
table of contents
Procedure on the Electronic Dictionary
Procedures on the ClassPad.net
Procedure on the Electronic Dictionary
Create 【連携コード】(Linkage code) on the electronic dictionary.
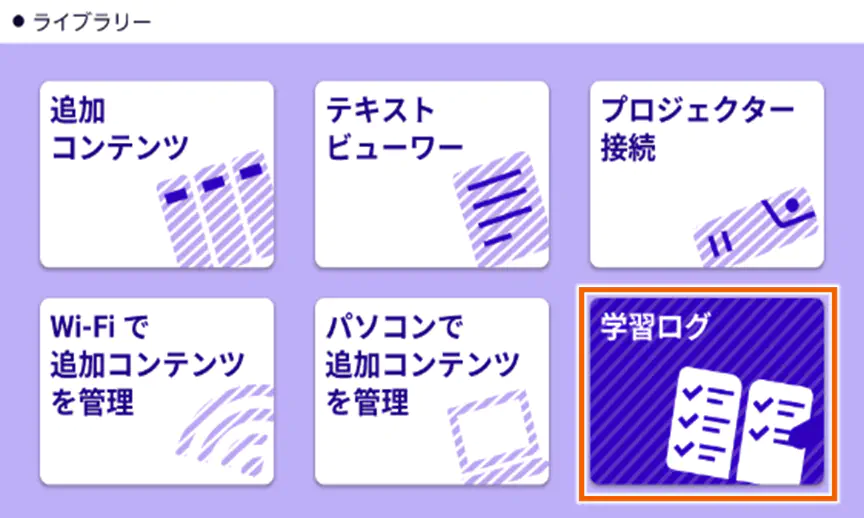
- Select 【学習ログ】 on ライブラリー(Library) screen.
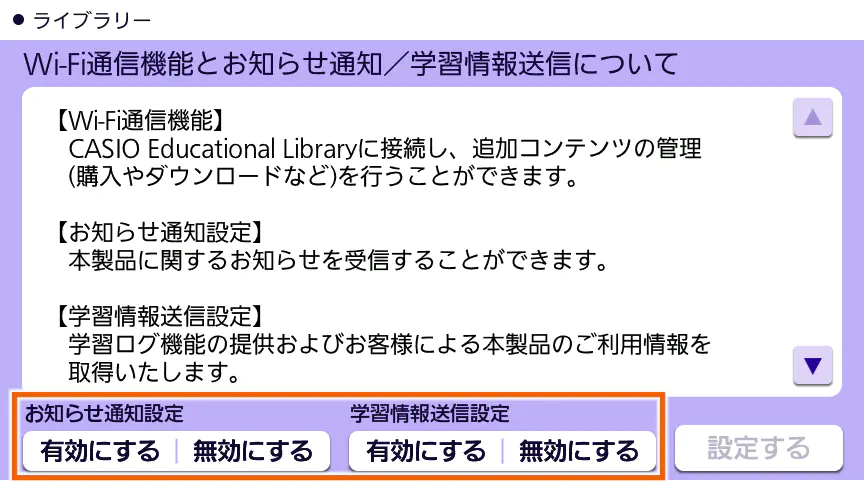
“Wi-Fi通信機能とお知らせ通知/学習情報送信について”(Wi-Fi communication function and notifications/Sending study information) screen is displayed - Select 【有効にする】(Enable) of “学習情報送信設定”(Sending study information setting).
Select either 【有効にする】(Enable) or 【無効にする】(Disable) for “お知らせ通知設定”(Notifications setting).
MEMO
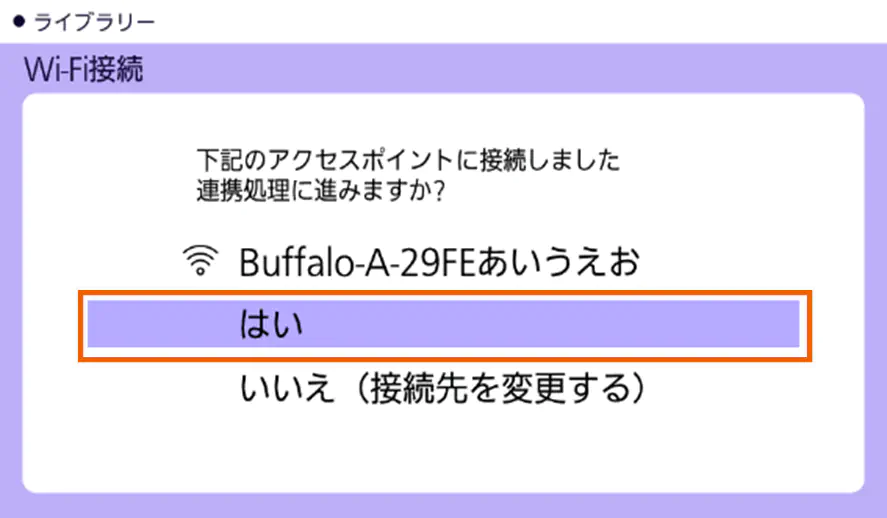
If “学習情報送信設定”(Sending study information setting) is enabled, study information is updated once a day. - Check whether Wi-Fi network is connected, and select 【はい】.
MEMO
If your electronic dictionary is not connected to any Wi-Fi network, choose an access point (Wi-Fi rooter).
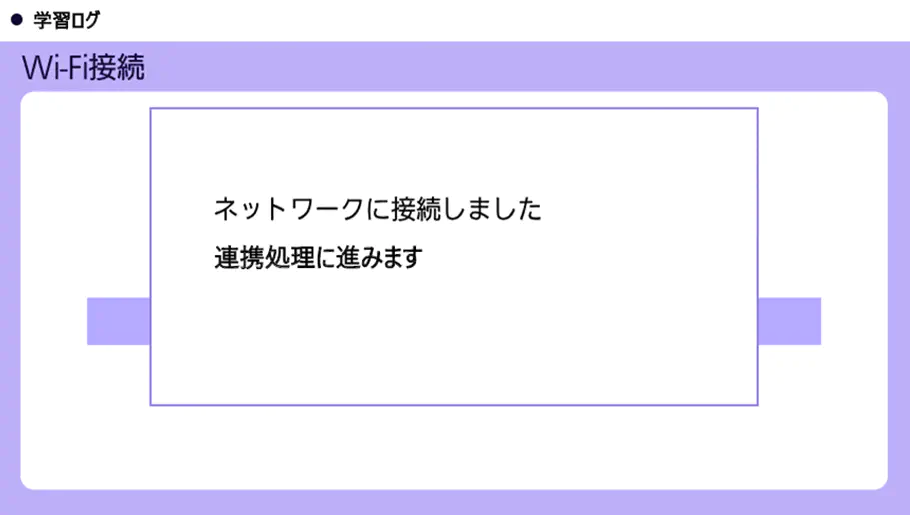
The network has been connected and “連携コード”(Linkage code) will be displayed.
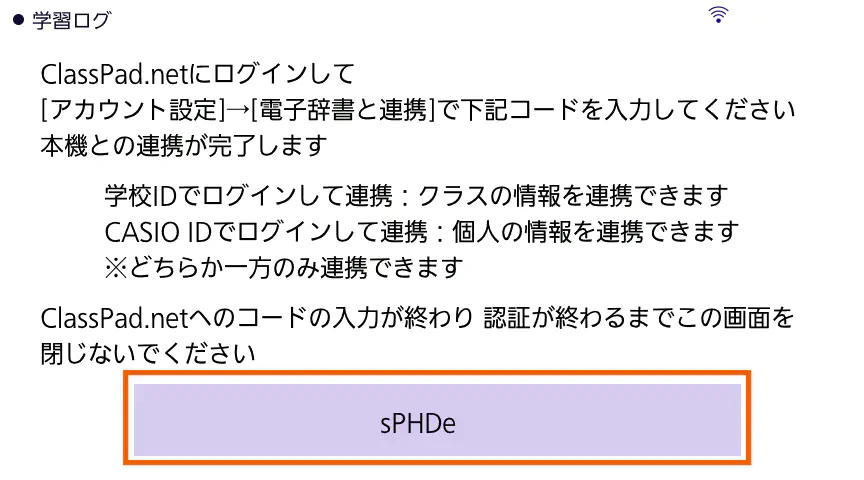
Next, perform the procedures on the ClassPad.net.
MEMO
“連携コード”(Linkage code) expires in 10 minutes after it created.If it expired, create it again.
Currently, even though you log in with your school ID, only personal information is linked by the data linkage.
Procedures on the ClassPad.net
Input “連携コード”(Linkage code) created in the electronic dictionary into ClassPad.net.
Important!
Either your school ID account or your CASIO ID account can be linked.
2 accounts cannot be linked at the same time.
If you want to link another account, Canceling the Data Linkage with Electronic Dictionaryand perform the procedure again.
The sample screens shown for this procedure are of the school ID account. The procedure is the same for CASIO ID account.
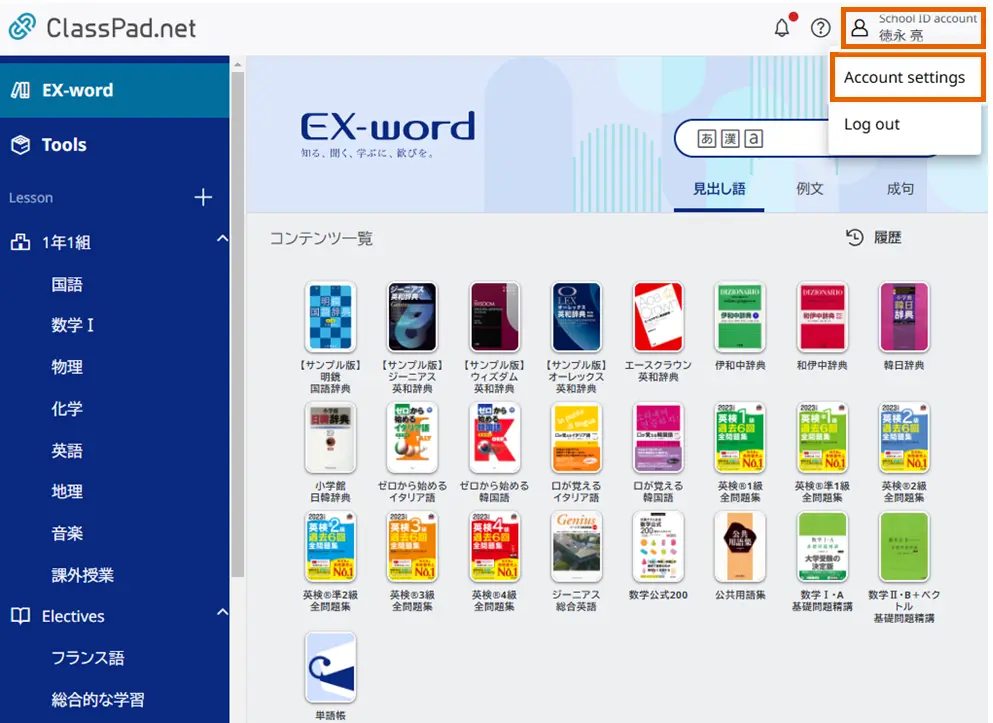
- Display the account menu and select 【Account settings】.
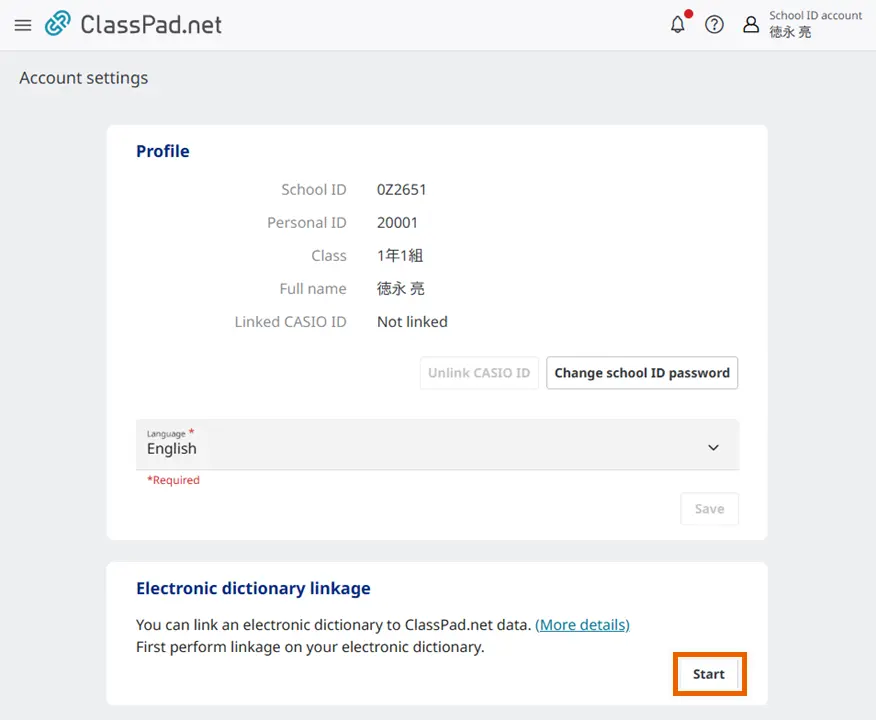
- Select 【Start】 of “Electronic dictionary linkage”.
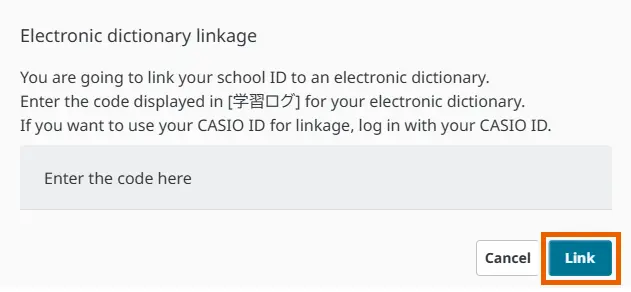
“Electronic dictionary linkage” window appears. - Enter the linkage code created in the electronic dictionary and select 【Link】.
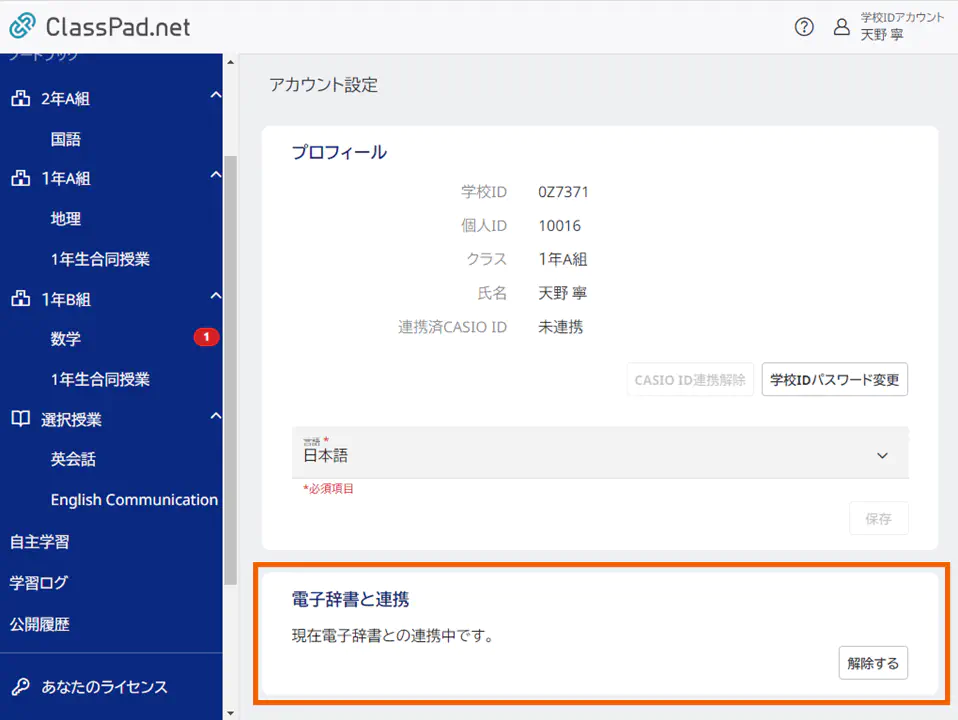
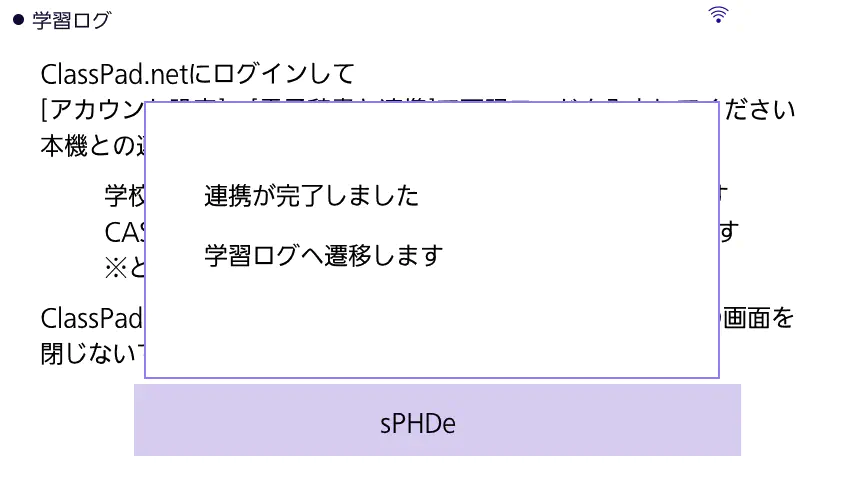
ClassPad.net and your electronic dictionary have been linked.
Linkage completion screen of ClassPad.net
Linkage completion screen of the electronic dictionary
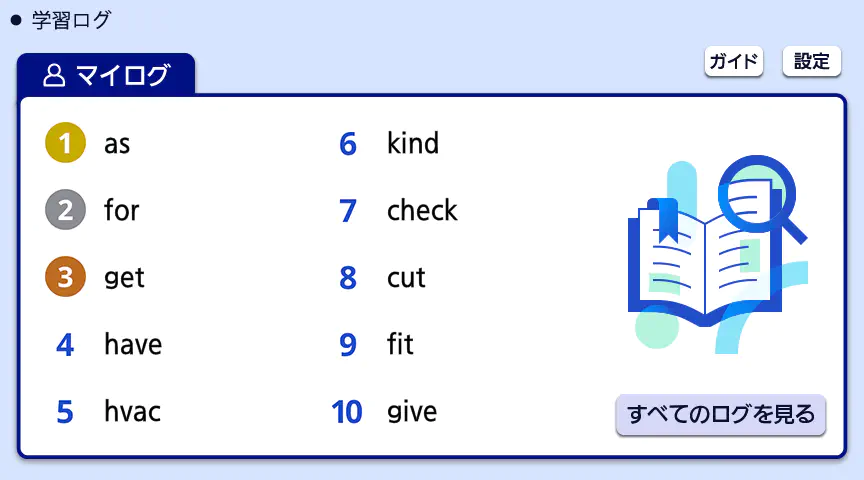
“学習ログ”(Study log) screen is displayed.
MEMO
Selecting 【ガイド】 in the upper right displays the QR code for this User Guide.
If you want to change the access point of Wi-Fi network, select 【設定】 in the upper right and select 【アクセスポイントの変更】.