Use this procedure to register a teacher or student account.
There are two ways to register accounts: individual registration and batch registration.
table of contents
Registering Teacher Accounts Individually
Registering Student Accounts Individually
Batch Registering Teacher Accounts
Batch Registering Student Accounts
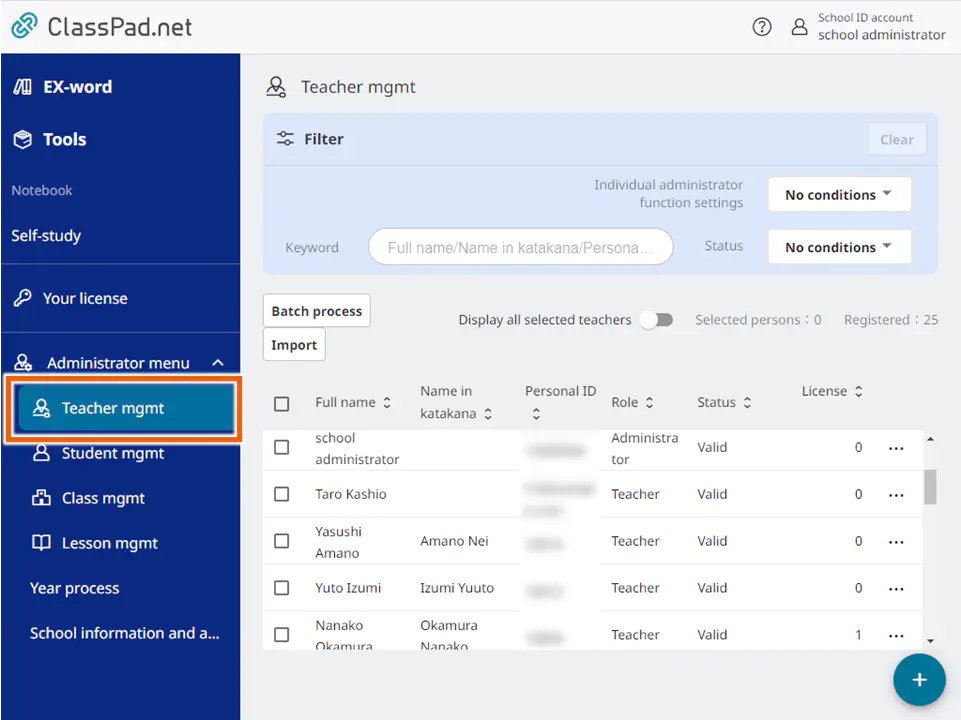
Registering Teacher Accounts Individually
- Select [
 Teacher mgmt] and then select
  .
.
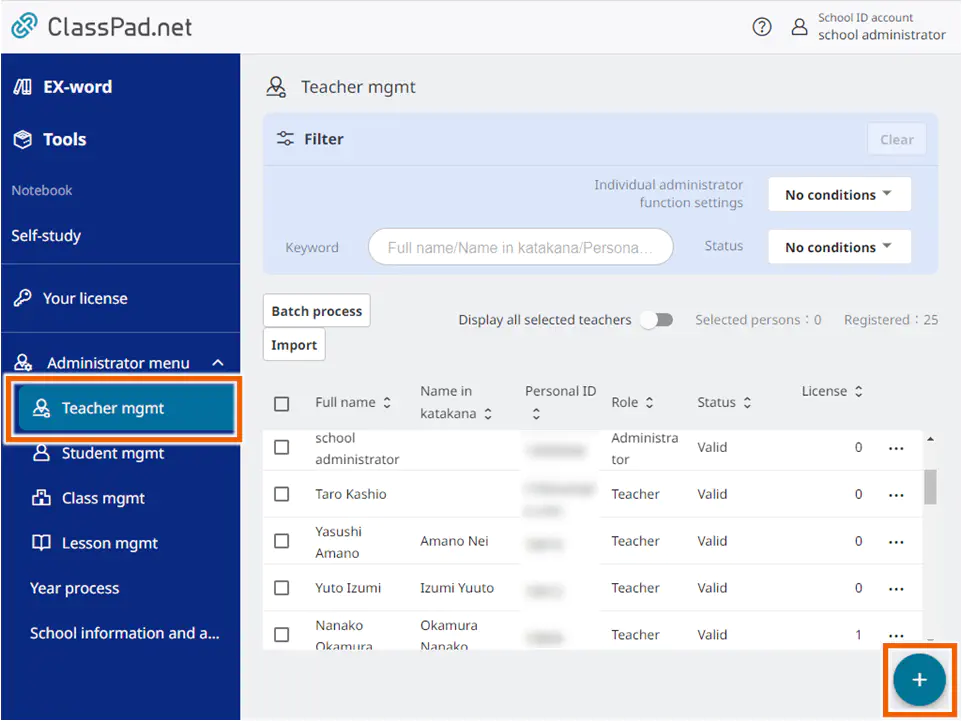
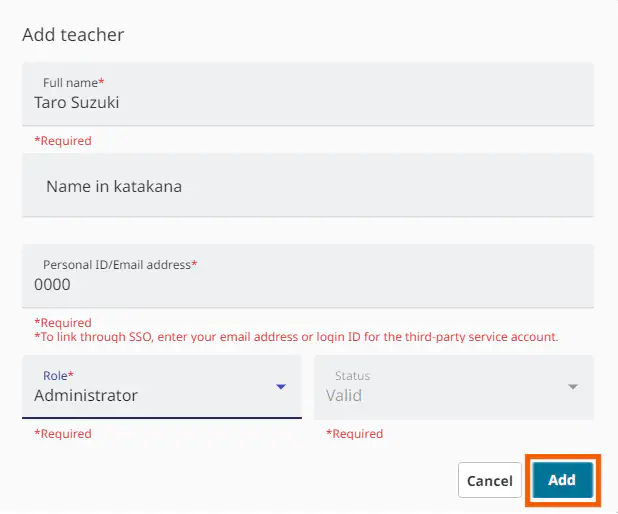
- Enter the information in each field and then select [Add].
MEMO
In fields marked with an asterisk (*), input is mandatory.
To register an administrator, select [Administrator] for [Role].
The account information is registered.
If you select [Teacher] for [Role], the checkboxes for individual administrator function settings are displayed.
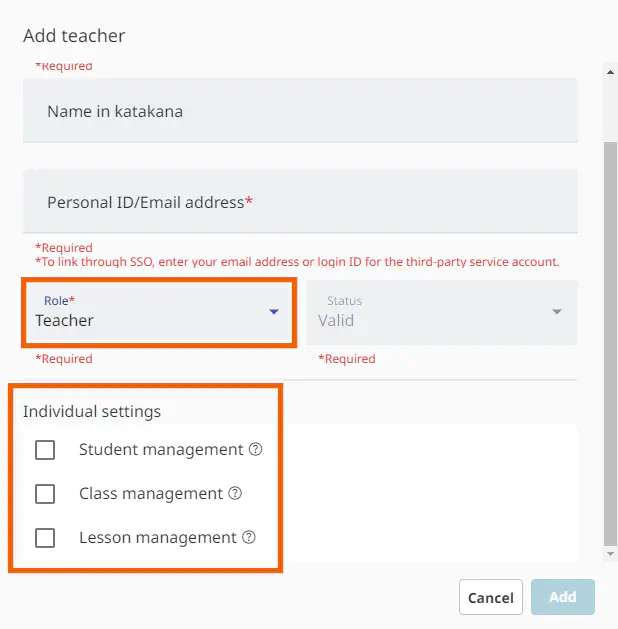
You can set the checked functions individually.
Select [?] shown to the right of each function to display its details.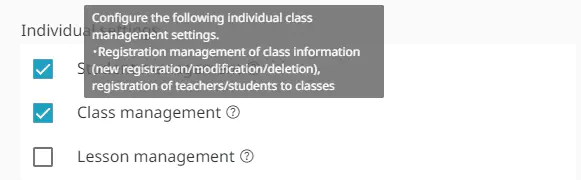
| Item | Details |
|---|---|
| Student management | Configure the following individual student management settings. ・Registration management of student information (new registration/modification/deletion) ・Password initialization ・License settings ・SSO linkage ・Move-out process |
| Class management | Configure the following individual class management settings. ・Registration management of class information (new registration/modification/deletion) ・Registration of teachers/students to classes |
| Lesson management | Configure the following individual lesson management settings. ・Registration management of lesson information (new registration/modification/deletion) ・Registration of teachers/students to lessons |
If you change the [Teacher] role to [Administrator], the individual settings are hidden. The checked statuses in the individual settings persist even if you change the role.
If you select the [Administrator] role, the above three administrator functions are granted.
MEMO
The Personal ID/Email address registered here is set as the initial password.
By default, [Valid] is displayed for the status. When adding accounts, you cannot change the statuses.
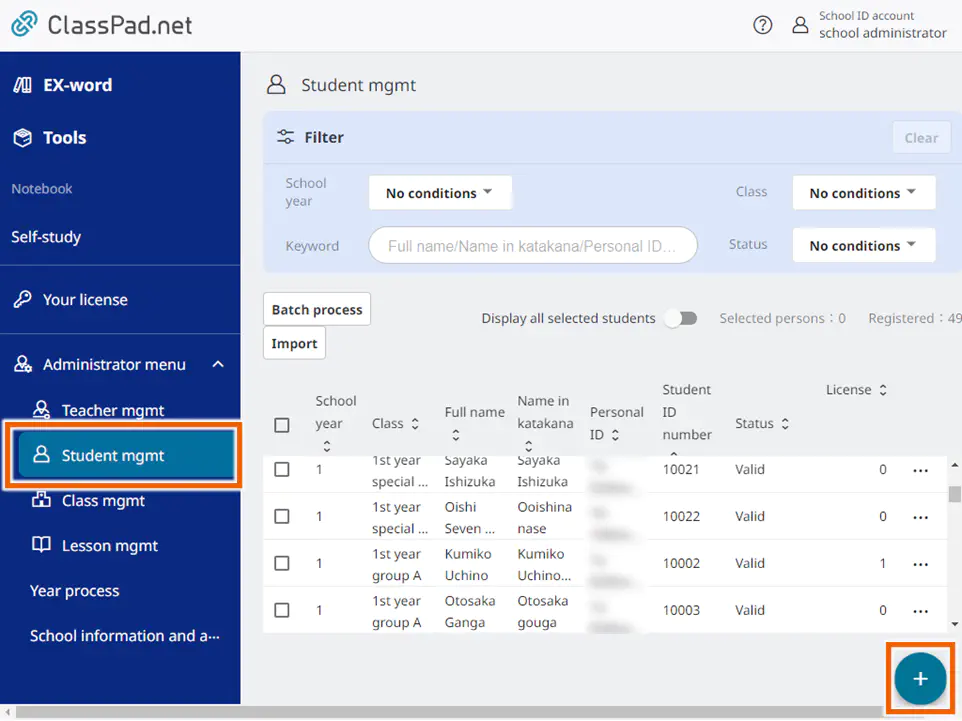
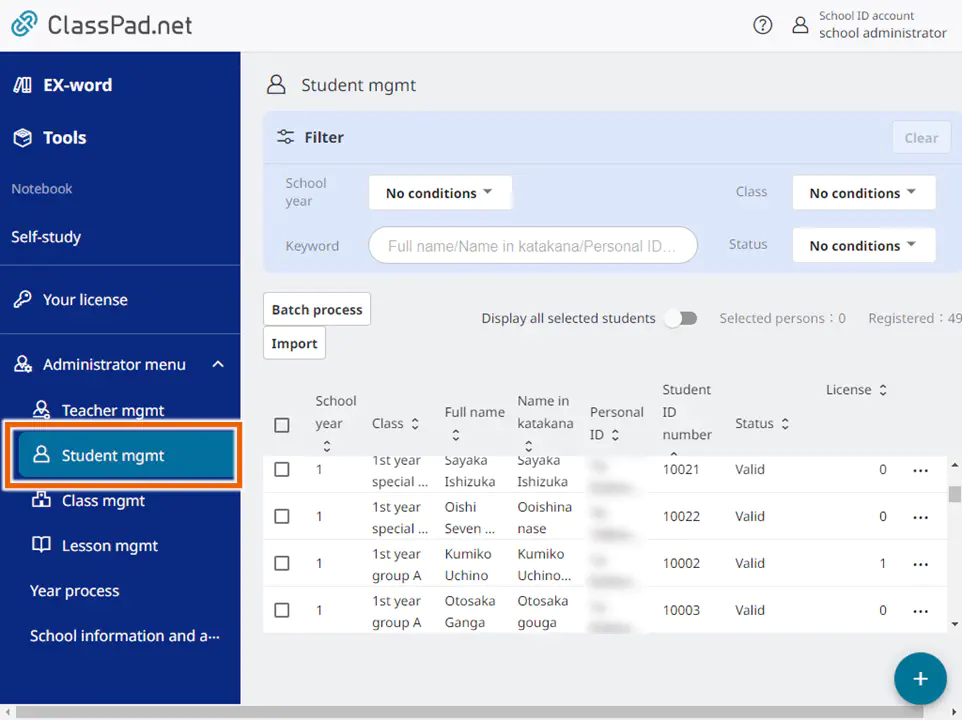
Registering Student Accounts Individually
- Select [
 Student mgmt] and then select .
- Enter the information in each field and then select [Add].
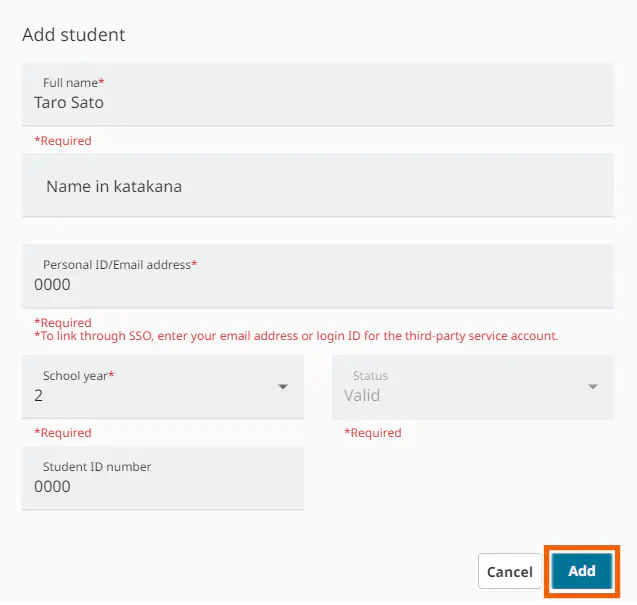
The account information is registered.
MEMO
In fields marked with an asterisk (*), input is mandatory.
The Personal ID/Email address registered here is set as the initial password.
For a student registration, there is no input for [Role].
By default, [Valid] is displayed for the status. When adding accounts, you cannot change the statuses.
Batch Registering Teacher Accounts
You can register multiple teacher accounts at the same time by importing a file containing the information for multiple accounts.
CSV files and Excel files can be imported.
Important
To create Excel files, use Excel 2013 or later.
Only “.xlsx” files can be imported as an Excel file. Files in other formats cannot be imported.
- Select [ Teacher mgmt].
If you already have a file containing the information, proceed to step 5. - In the [Import] menu, select [Register new ID] and then [Download template (Excel)] or [Download template (CSV)].
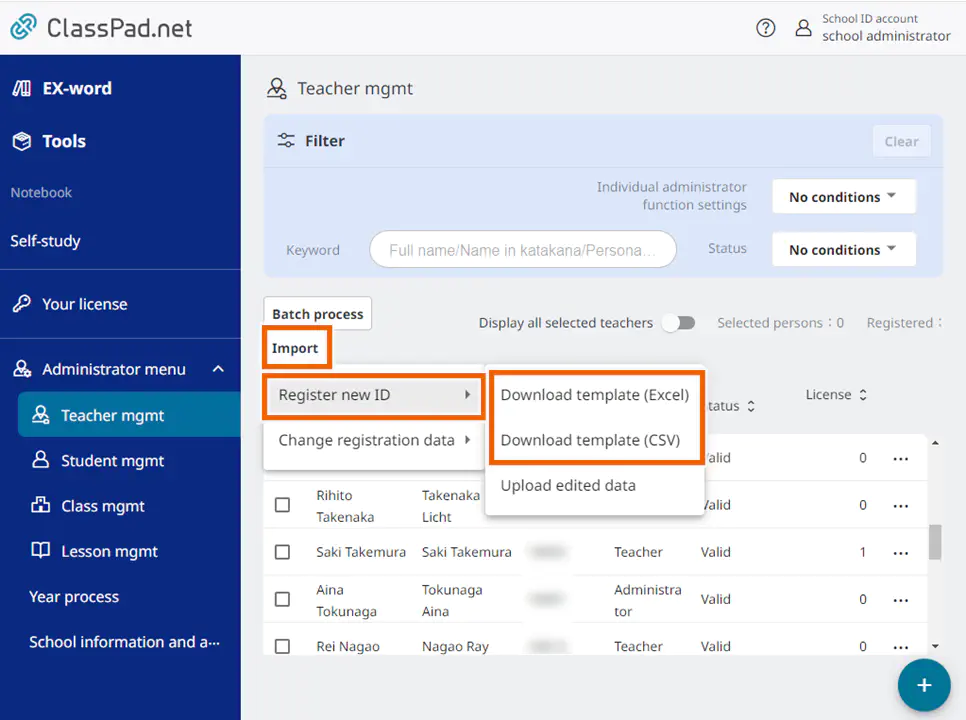
- Select the save destination and download the template file.
The method for selecting the save destination varies depending on your browser, so refer to your browser’s help. - Enter the information shown below for the downloaded file.
Item Mandatory field Explanation Personal ID/Email address 〇 Up to 255 characters, consisting of alphanumeric characters and the symbols used in the email address. Full name 〇 Up to 32 characters (commas (,) not permitted) Name in katakana Up to 120 characters (commas (,) not permitted) Role 〇 ・ To register as an administrator, enter “1” (single byte).
・ To register as a teacher, enter “2” (single byte).Student management For a teacher who uses the student management function, enter “1” (single byte). Class management For a teacher who uses the class management function, enter “1” (single byte). Lesson management For a teacher who uses the lesson management function, enter “1” (single byte). Important
The file format differs from that used for students. Be sure to enter the data in a template file downloaded from the management screen for teachers.
Do not change the 1st line (column heads) of the format.
You cannot set the same Personal ID/Email address for multiple teachers or students.
The Personal ID/Email address registered here is set as the initial password.
Entering the email address for an external service account enables you to also log in by linking to that external service account.
If you change the “Personal ID/Email address” after the initial login authentication, you must also initialize your password after you make the change.
An account with the Administrator role can use all the student management, class management, and lesson management functions.
You can register up to 500 teachers/administrators. However, if you are linking to an external platform service, the registration limit for that service takes precedence.
If you use spreadsheet software to edit a CSV file containing values that start with a zero (0), the zeros may be deleted when you save the file. In that situation, either enter values that do not start with zero, or use a different editing program.
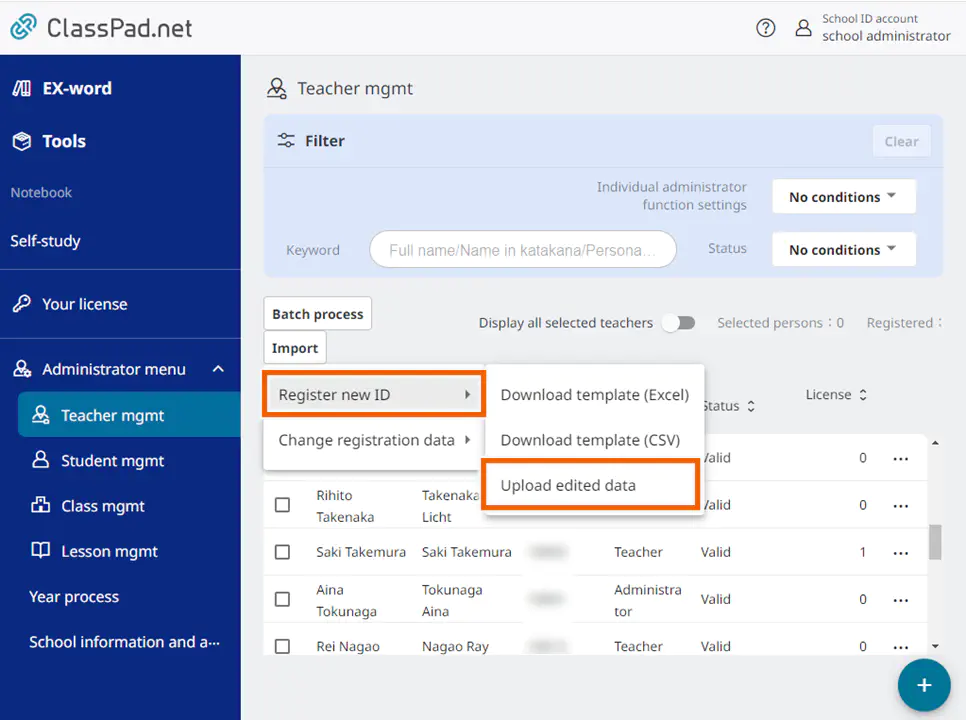
For the Administrator role, no input is necessary. - In the [ Teacher mgmt] screen, select [Import].

- Select [Register new ID] and then [Upload edited data].
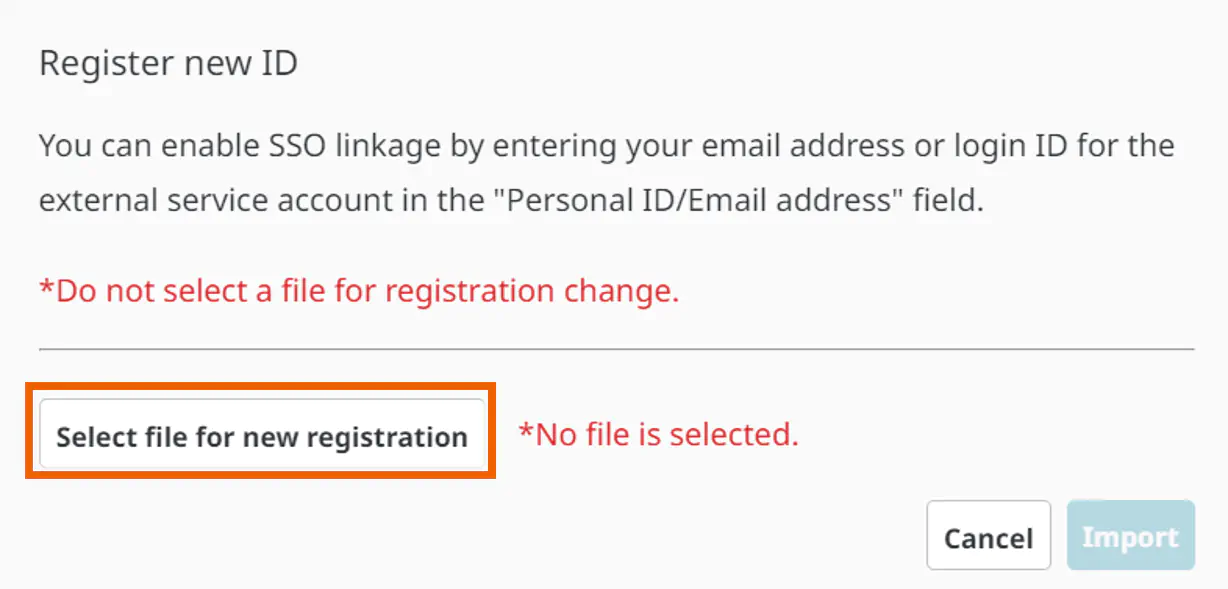
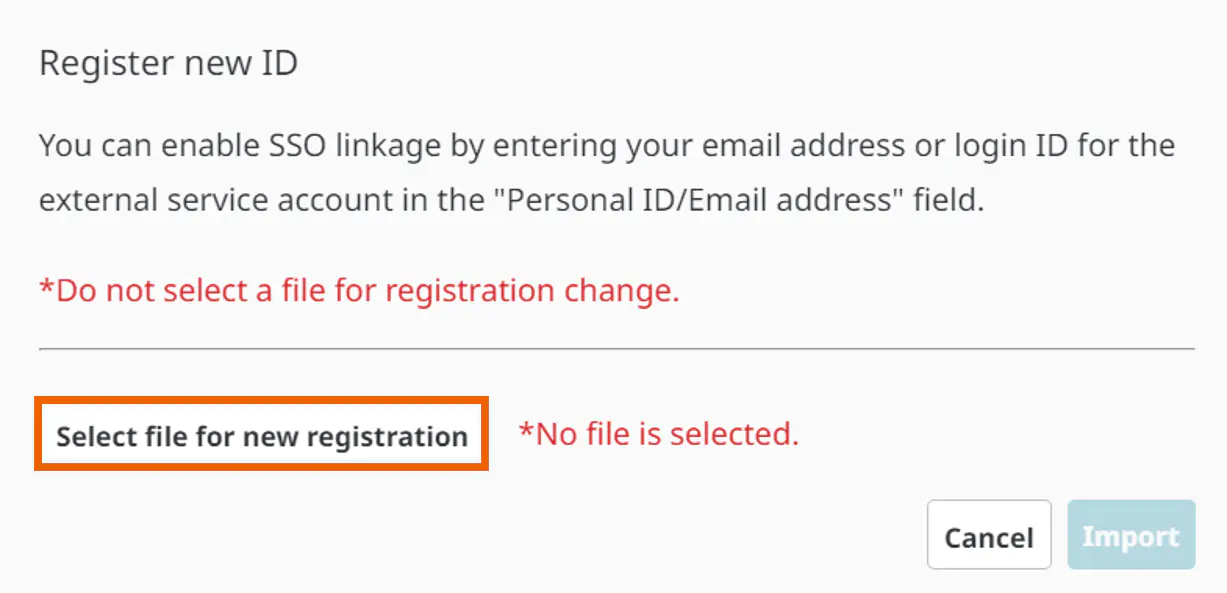
- Select [Select file for new registration] and then select the import CSV file entered in step 4.
The method for selecting the CSV file varies depending on your browser, so refer your browser’s help menu.
Important
Do not select one of the files listed below. The file format is different and may cause incorrect information to be registered.
- A CSV file other than the file for teachers created in step 4
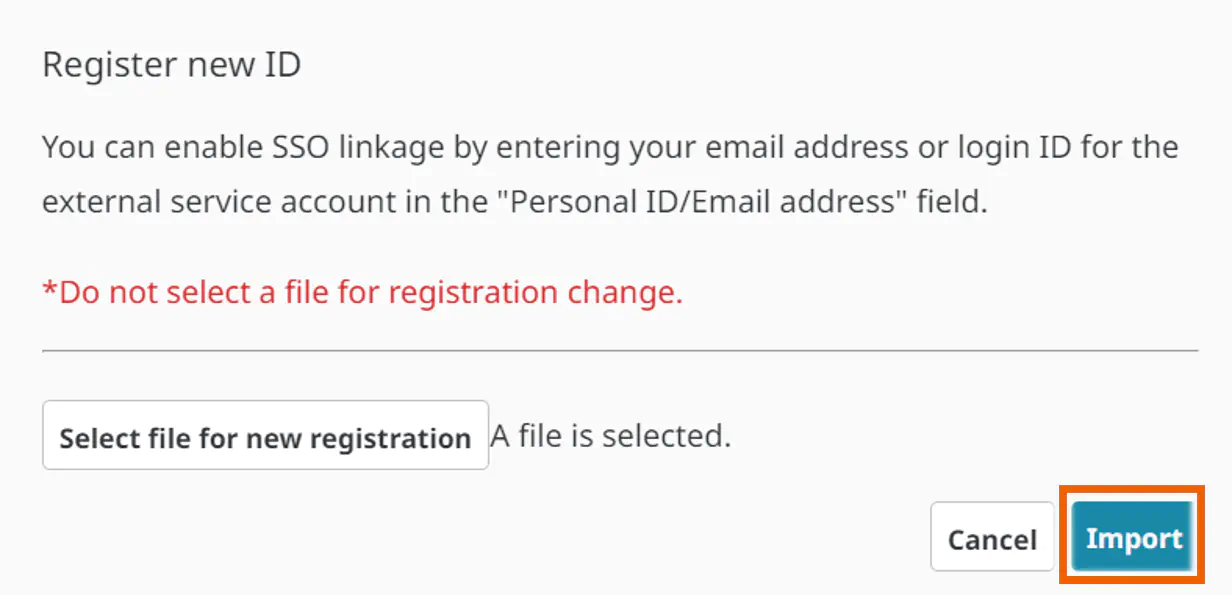
- A CSV file for registering a change - Select [Import].
- In the confirmation screen, select [Import].
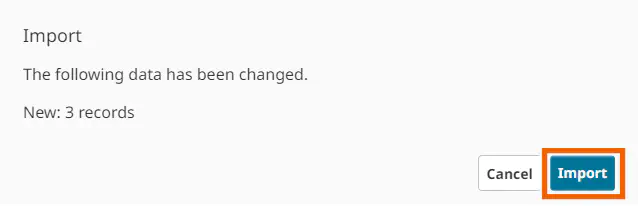
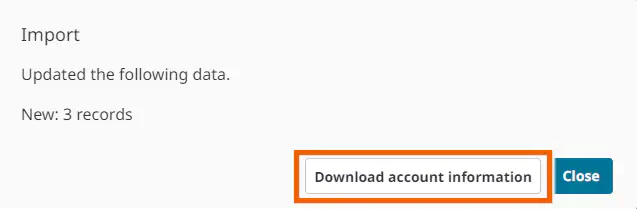
The account information is batch registered.
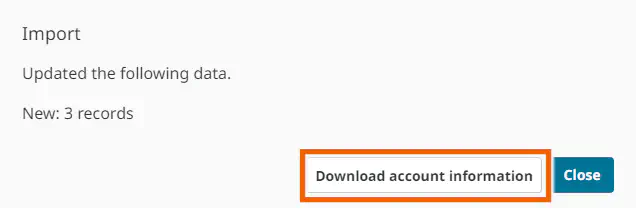
To continue to download the account information, proceed to step 10.
MEMO
Batch registration does not change or delete existing registered accounts.
For [Change registration data], [Download account information] is not displayed in the import completion dialog.
A page of account information is output per account and up to 500 pages (for 500 accounts) are output to a PDF file. - Select [Download account information].
- Select [Create].
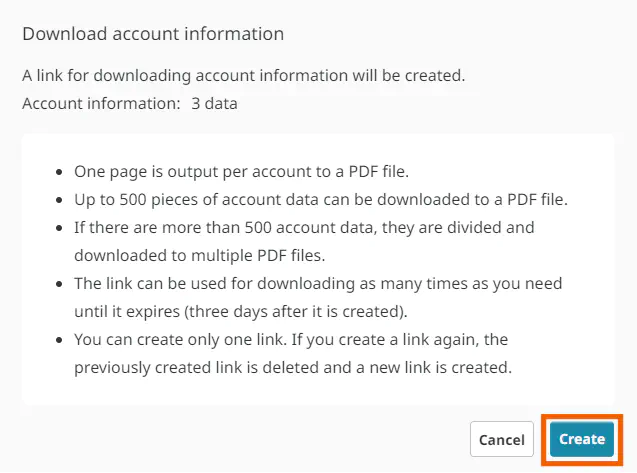
Download link creation starts.
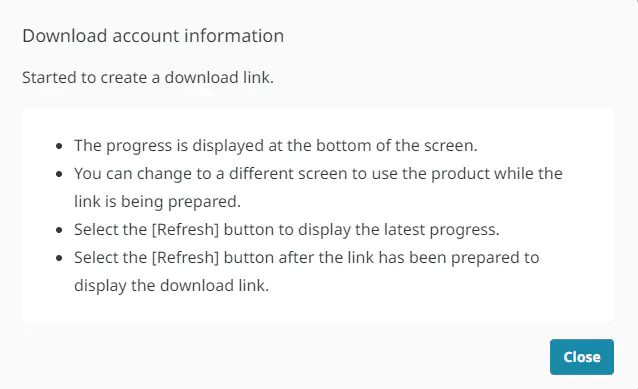
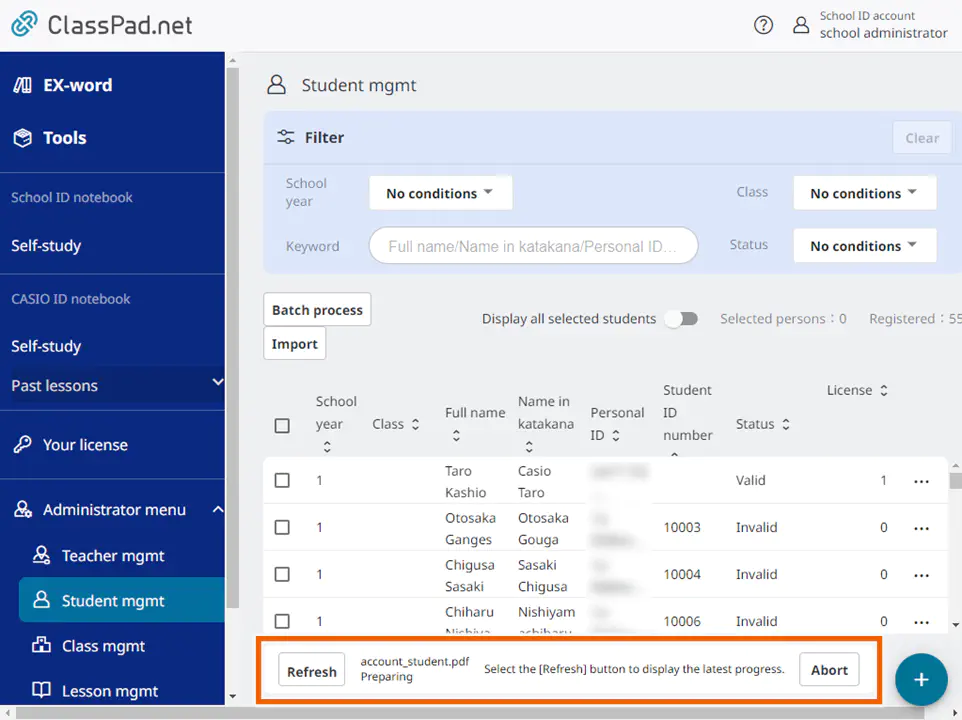
- Select [Refresh] to see the link creation progress.
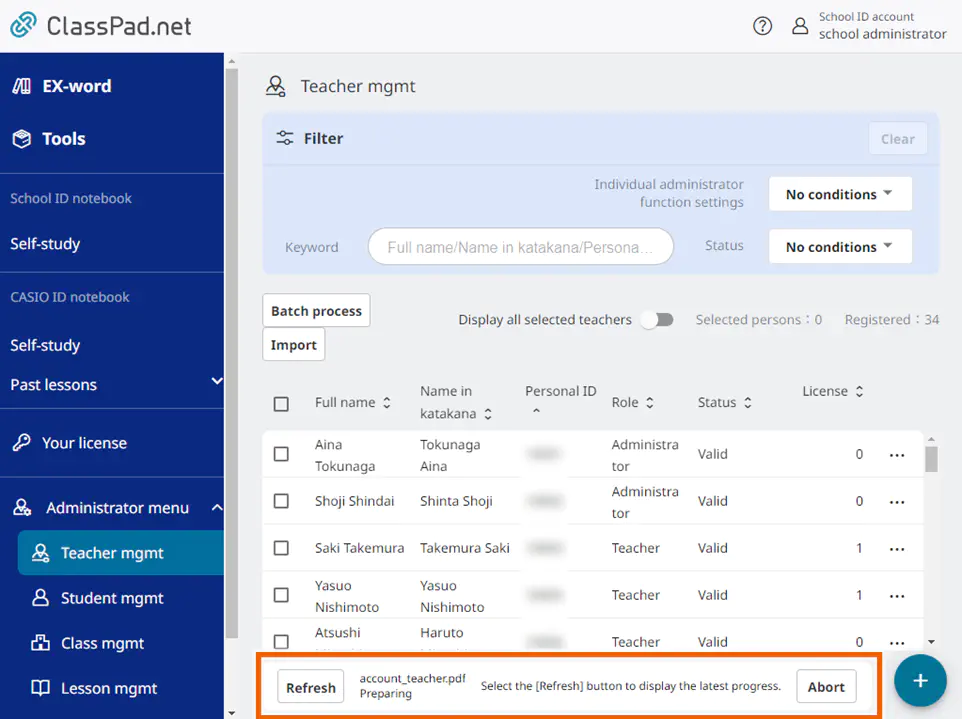
When the link creation completes, [Download file] is displayed.
MEMO
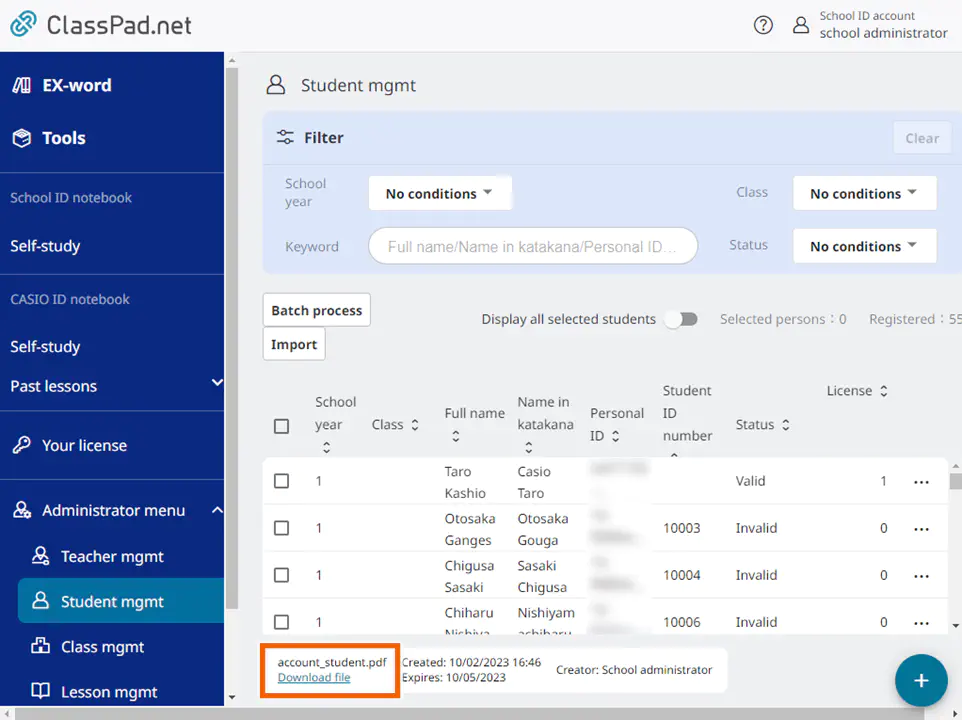
To cancel the link creation, select [Abort]. - Select [Download file].
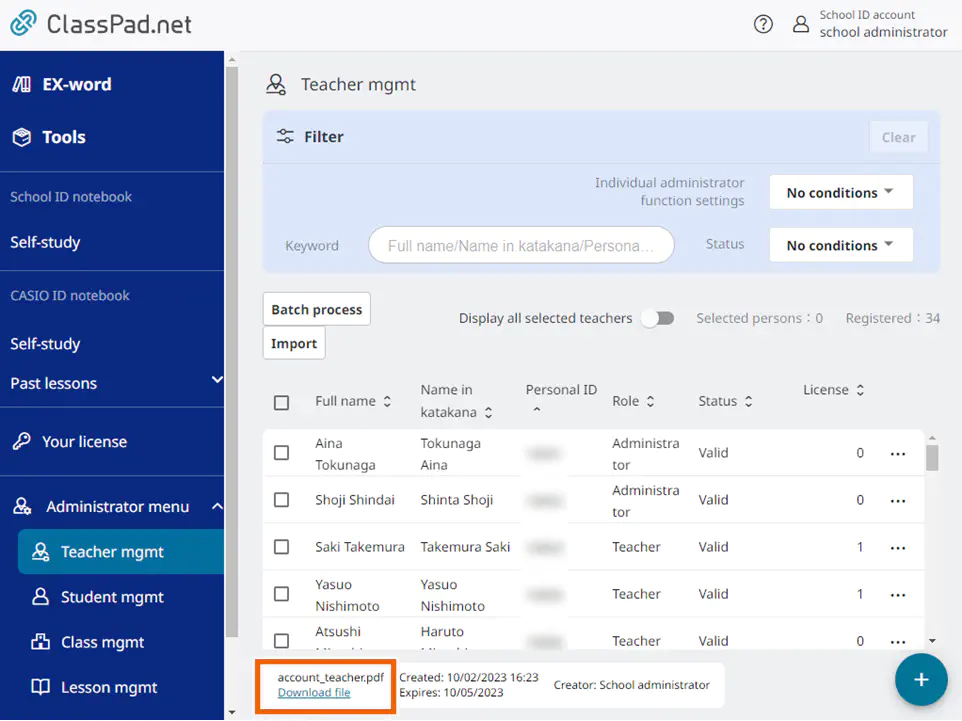
The account information is downloaded.
MEMO
The link is valid for three days after it is created. The created link is deleted when it expires.
Batch Registering Student Accounts
You can register multiple student accounts at the same time by importing a file containing the information for multiple accounts.
CSV files and Excel files can be imported.
Important
To create Excel files, use Excel 2013 or later.
Only “.xlsx” files can be imported as an Excel file. Files in other formats cannot be imported.
- Select [ Student mgmt].
If you already have a file containing the information, proceed to step 5. - In the [Import] menu, select [Register new ID] and then [Download template (Excel)] or [Download template (CSV)].
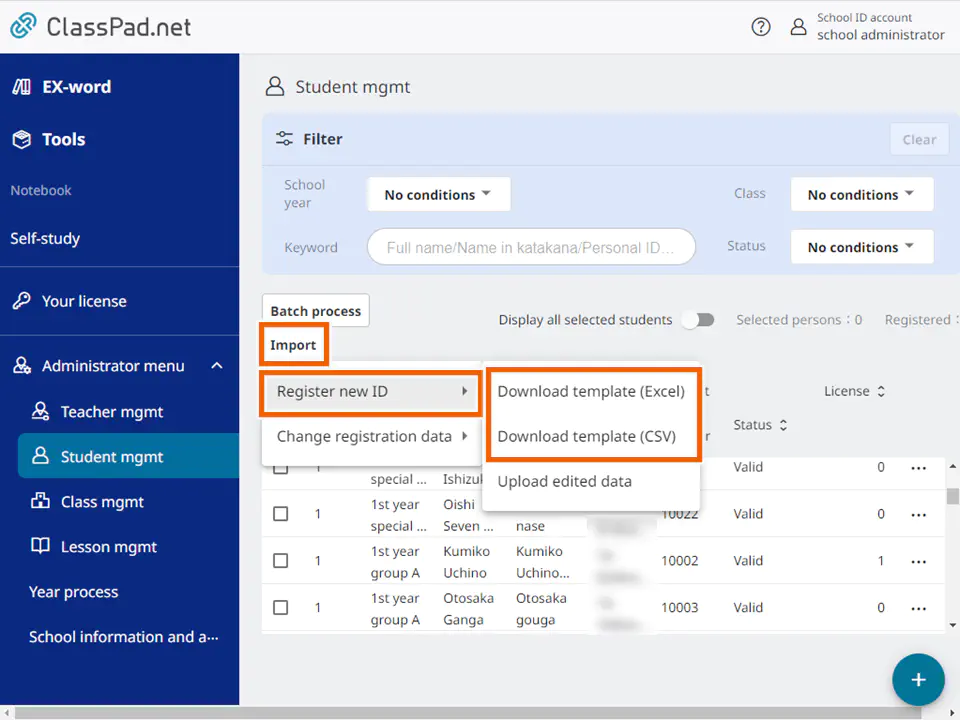
- Select the save destination and download the template file.
The method for selecting the save destination varies depending on your browser, so refer to your browser’s help. - Enter the information shown below for the downloaded file.
Item Mandatory field Explanation Personal ID/Email address 〇 Up to 255 characters, consisting of alphanumeric characters and the symbols used in the email address. Full name 〇 Up to 32 characters (commas (,) not permitted) Name in katakana Up to 120 characters (commas (,) not permitted) School year 〇 Number from 1 to 9 (single byte) (the numbers that can be entered vary depending on the school type) Classes 1-5 ・ Up to 255 characters
・ The information entered should include the school year (e.g. Year 1 Class 1).
・ Up to 5 classes for each studentStudent ID number Up to 255 alphanumerics and symbols (commas (,) not permitted) Important
The file format differs from that used for teachers. Be sure to enter the data in a template file downloaded from the management screen for students.
You cannot add students to an existing registered school year and class.
Do not change the 1st line (column heads) of the format.
You cannot set the same Personal ID/Email address for multiple teachers or students.
The Personal ID/Email address registered here is set as the initial password.
Entering the email address for an external service account enables you to also log in by linking to that external service account.
If you change the “Personal ID/Email address” after the initial login authentication, you must also initialize your password after you make the change.
You can register up to 4500 students. However, if you are linking to an external platform service, the registration limit for that service takes precedence.
You can register up to 99 students in the same school year and class.
If you use spreadsheet software to edit a CSV file containing values that start with a zero (0), the zeros may be deleted when you save the file. In that situation, either enter values that do not start with zero, or use a different editing program.
Do not delete columns in the file if no class is registered. Deleting columns results in an error during import.
MEMO
If you enter both the school year and class information, the class information will be registered and the students will also be registered in the class information when the data is imported. - In the [ Student mgmt] screen, select [Import].
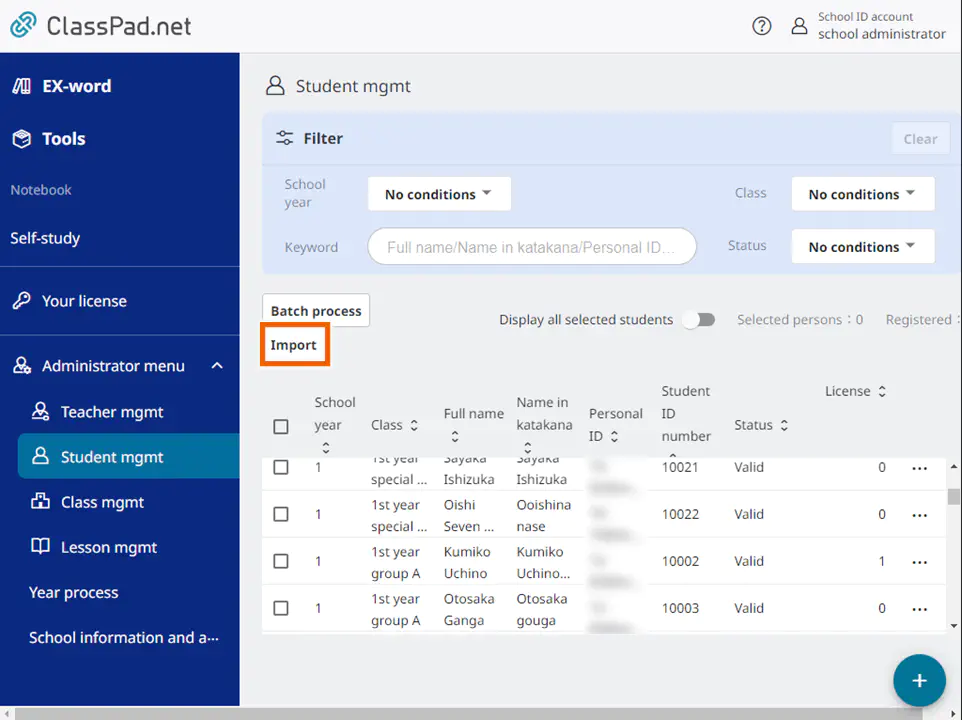
- Select [Register new ID] and then [Upload edited data].
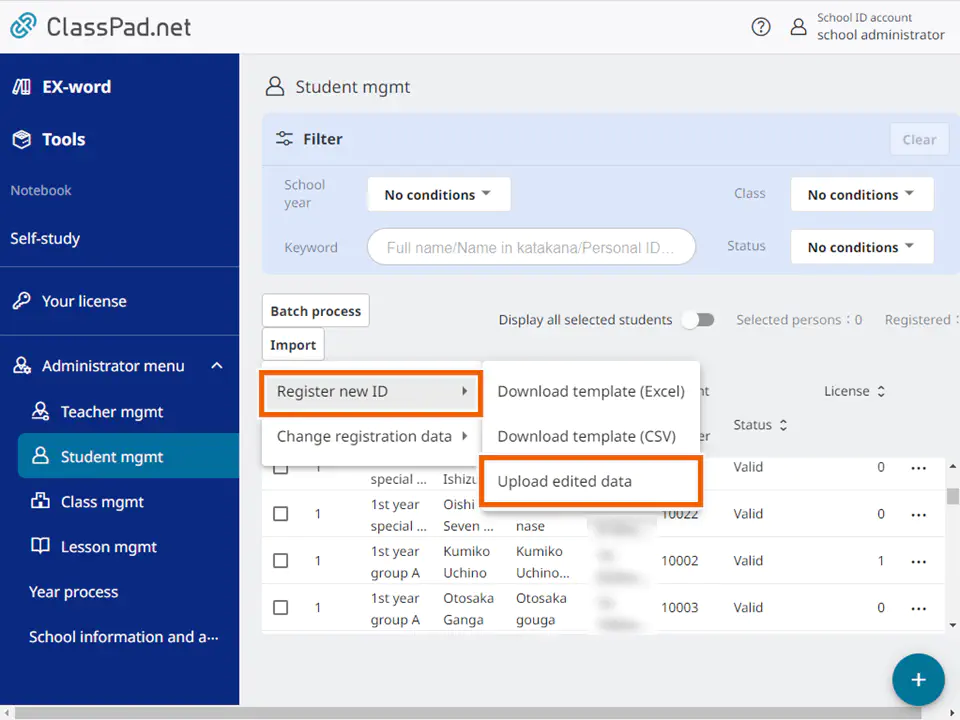
- Select [Select file for new registration] and then select the import file edited in step 4.
The method for selecting the file varies depending on your browser, so refer to your browser’s help.
Important
Do not select one of the files listed below. The file format is different and may cause incorrect information to be registered.
-A file other than the file for students edited in step 4
-A file for registering a change - Select [Import].

- In the confirmation screen, select [Import].
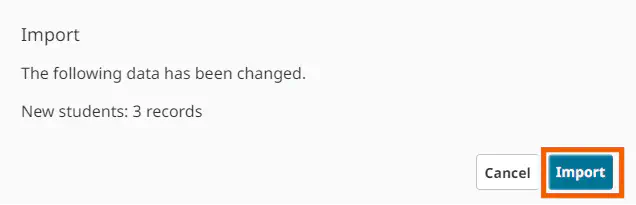
The account information is batch registered.
To continue to download the account information, proceed to step 10.
MEMO
Batch registration does not change or delete existing registered accounts.
For [Change registration data], [Download account information] is not displayed in the import completion dialog.
A page of account information is output per account and up to 500 pages (for 500 accounts) are output to a PDF file.
If you have more than 500 participants, download multiple PDF files together as a ZIP file. - Select [Download account information].
- Select [Create].
Download link creation starts.
- Select [Refresh] to see the link creation progress.
When the link creation completes, [Download file] is displayed.
MEMO
To cancel the link creation, select [Abort]. - Select [Download file].
The account information is downloaded.
MEMO
The link is valid for three days after it is created. The created link is deleted when it expires.