Group work allows multiple students to edit notebooks at the same time.
table of contents
Creating Group Work Manually
Creating by Shuffling
Creating from History
Using an Existing Notebook as a Template
Stopping/Starting Sharing Group Work
Organizing Folders/Notebooks
Displaying the Grouping List
Creating Group Work Manually
- Select a lesson you want to create group work for and select [Group work].
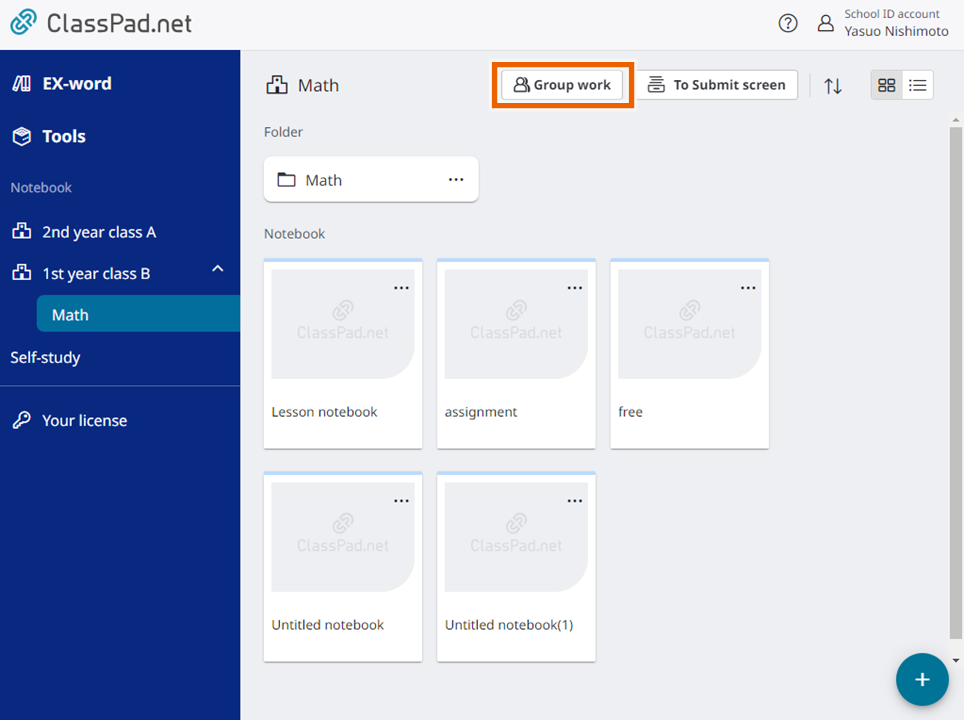
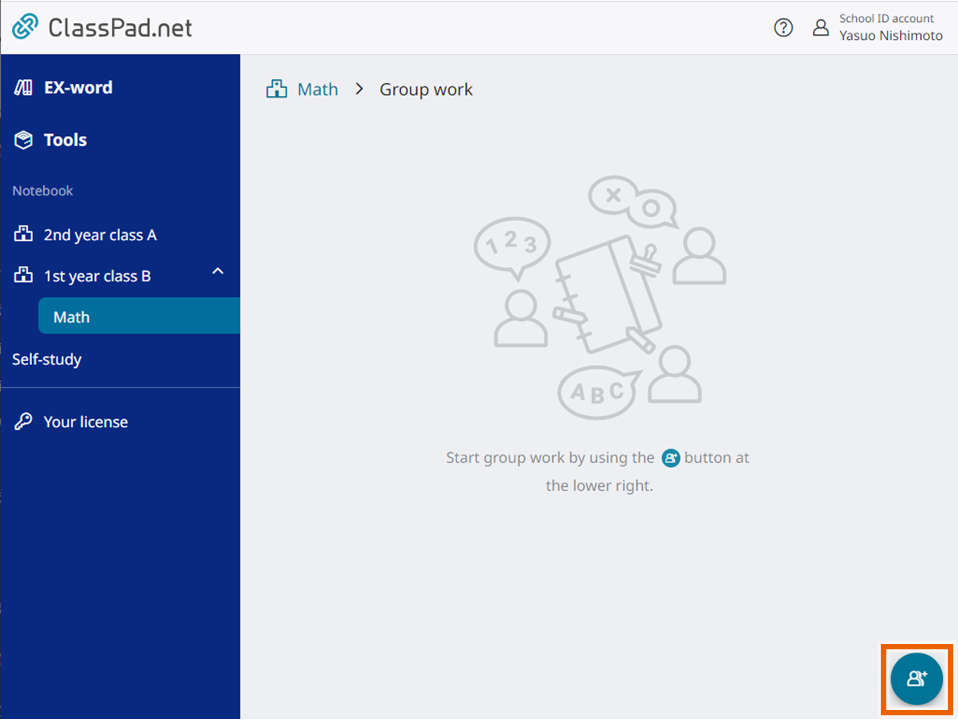
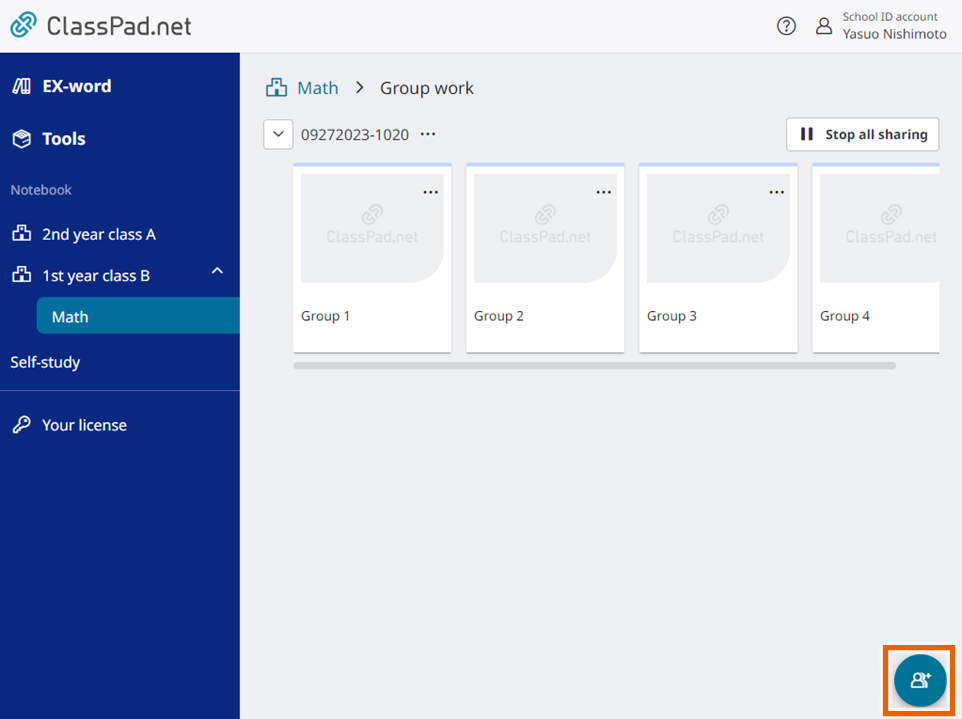
The group work screen appears. - Select
 .
.
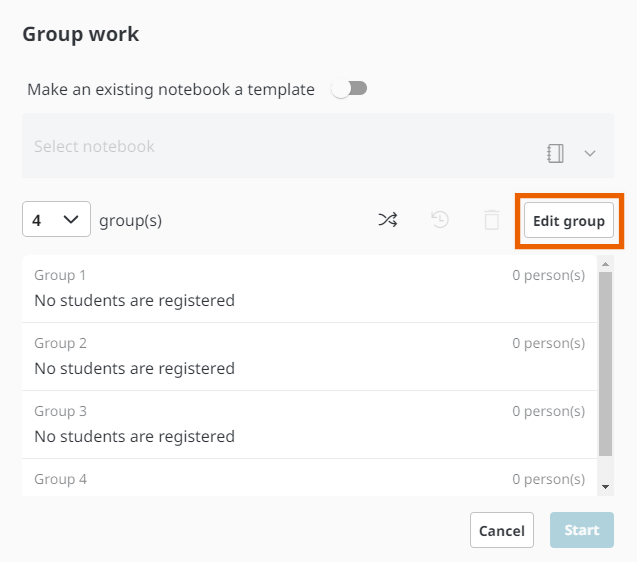
The group work dialog appears. - Select [Edit group].
The [Edit group] dialog appears. - Select the number of groups you want to create.
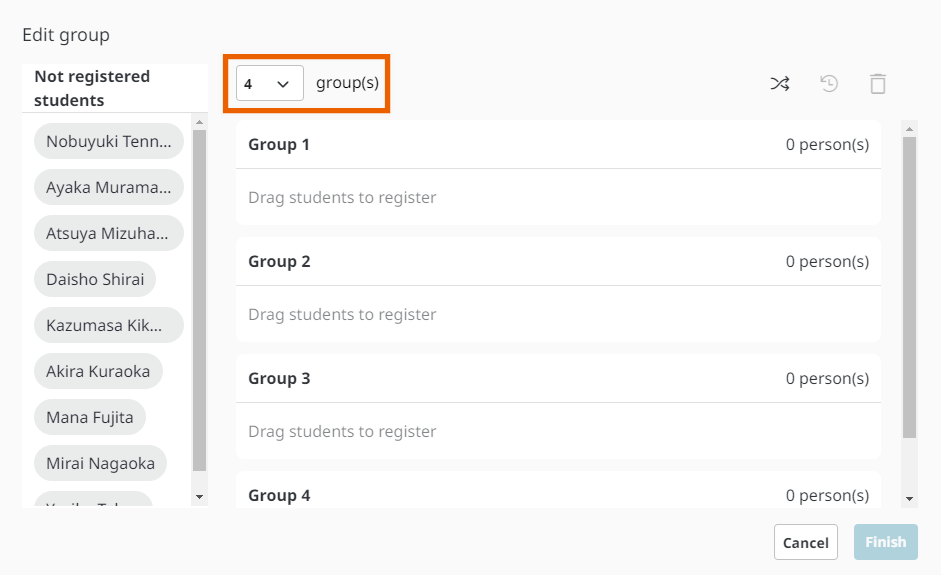
MEMO
You can create 1 to 10 groups. - Drag and drop one or more students from the [Not registered students] list to each group.
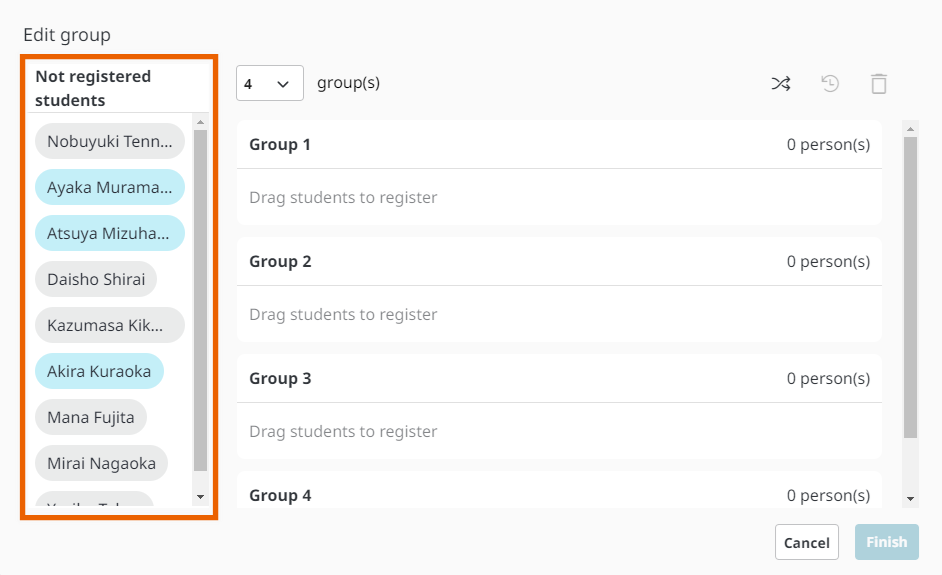
MEMO
You can register up to 20 students per group. - Select [Finish].
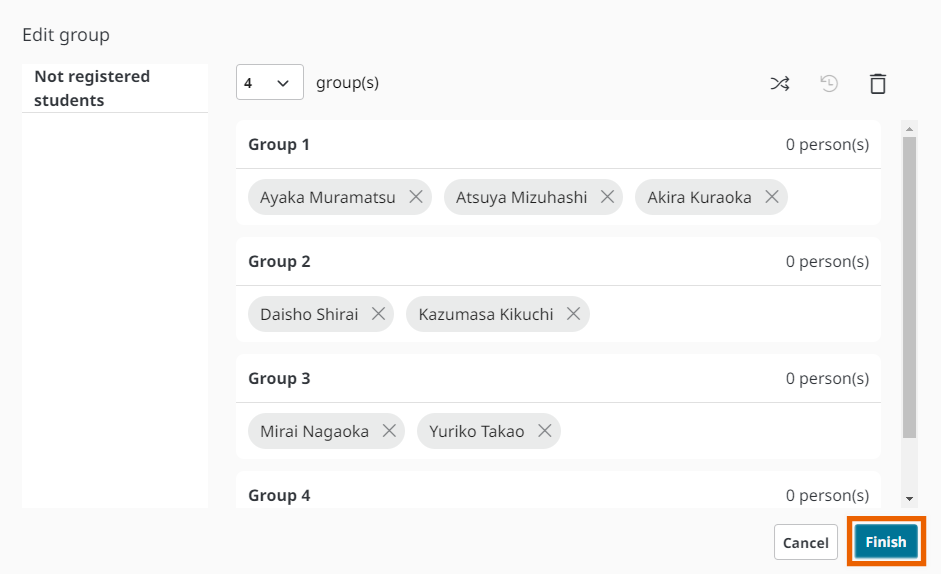
- Select [Start].
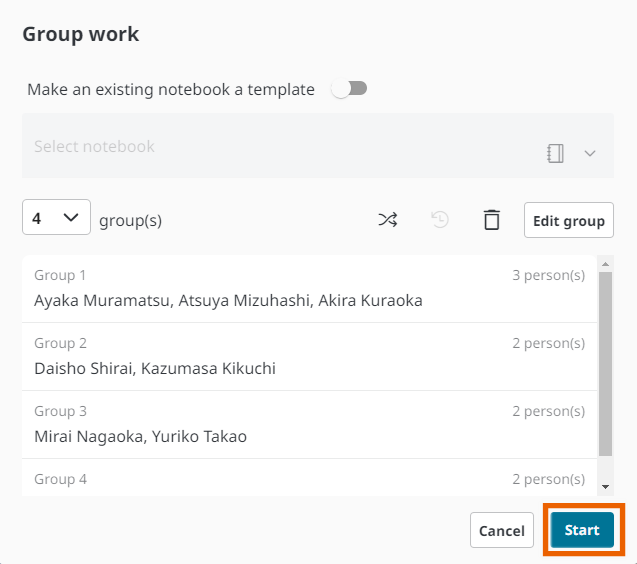
A notebook is created based on the specified number of groups.
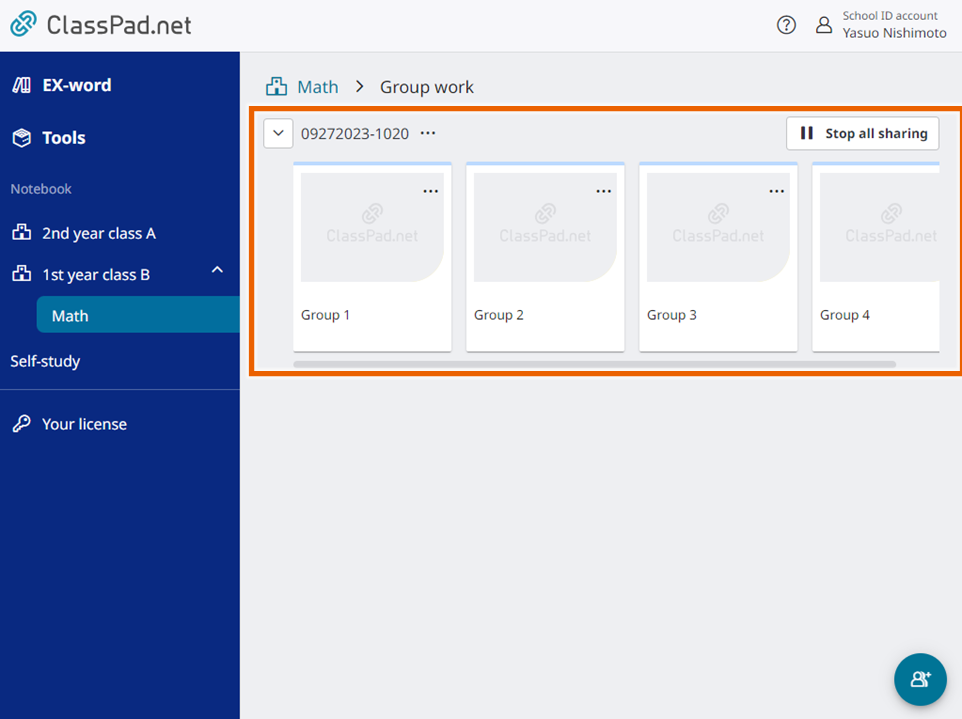
MEMO
You can use an existing notebook as a template to create a group (“Make an existing notebook a template“).
You can select to show/hide the group work folder.
Select to clear the selected number of groups and student names.
Creating by Shuffling
You can evenly divide the students taking a lesson into groups.
- Select a lesson you want to create group work for and select [Group work].

The group work screen appears. - Selectt
 .
.

The group work dialog appears. - Select the number of groups you want to create.
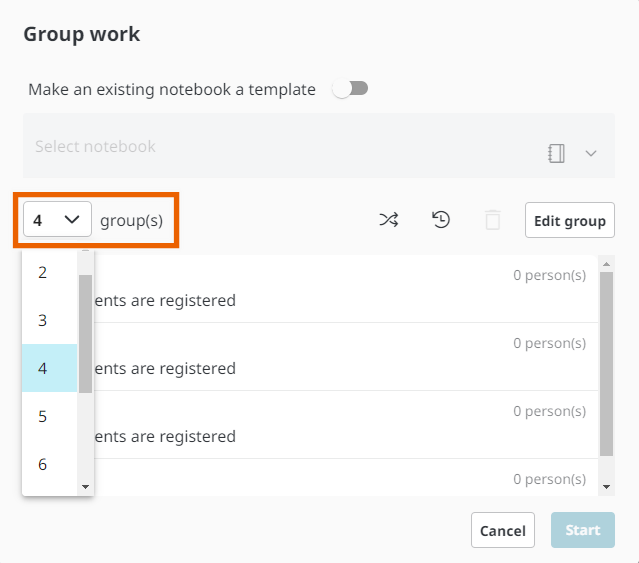
MEMO
You can create 1 to 10 groups.
Shuffling is not available if the number of the students taking the lesson is less than the specified number of groups. - Select
 .
.
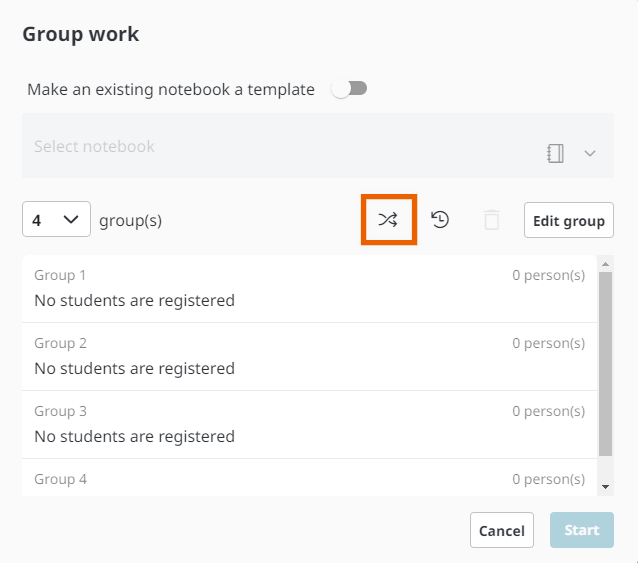
The students taking the lesson are divided into the specified number of groups.
MEMO
You can register up to 20 students per group.
If the students cannot be divided evenly, the remaining students are allocated sequentially to the groups starting from group 1.
Select again to shuffle the students again.
To edit a group created by shuffling, select [Edit group]. The procedure for editing a group is the same as the procedure from step 4 in “Creating Group Work Manually“. - Select [Start].
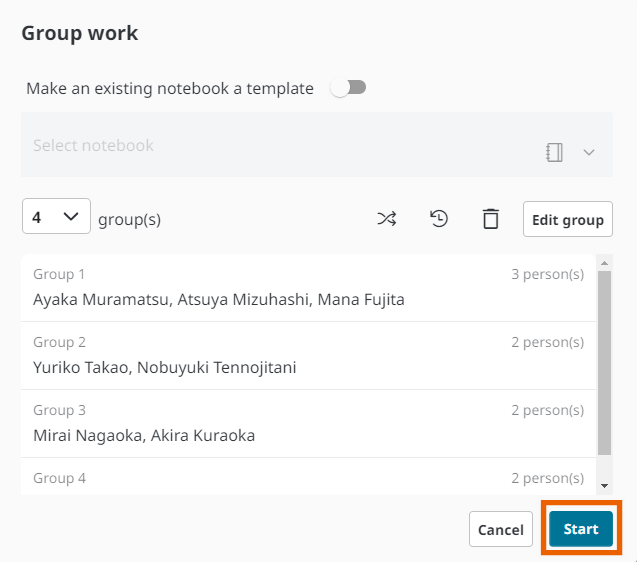
A notebook is created based on the specified number of groups.
Creating from History
If you have created group work before, you can reuse the same number of groups and student allocation to create a group.
- Select a lesson you want to create group work for and select [Group work].

The group work screen appears. - Select
 .
.
The group work dialog appears. - Select
 .
.
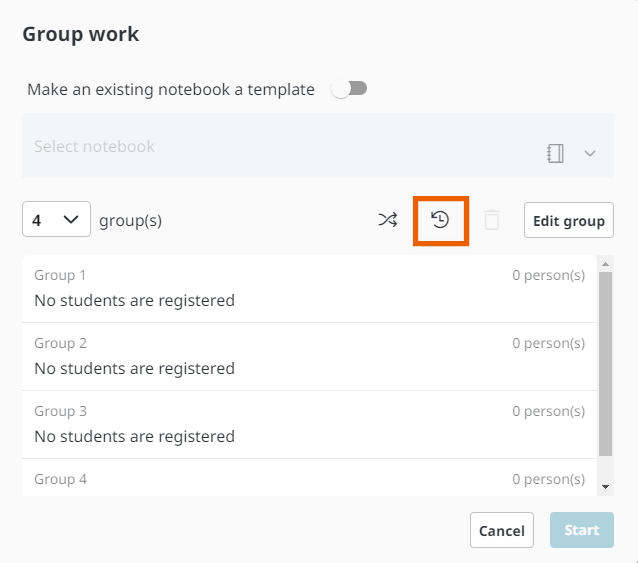
The number of groups and student allocation from history are applied.
MEMO
You can reuse only one history item for each lesson. - Select [Start].

A notebook is created based on the specified number of groups.
Using an Existing Notebook as a Template
You can use an existing notebook from self-study or lessons as a template to create a group.
- Creating from the Group Work Screen
- Select a lesson you want to create group work for and select [Group work].

The group work screen appears. - Select
 .
.

The group work dialog appears. - Enable [Make an existing notebook a template] and select [Select notebook].
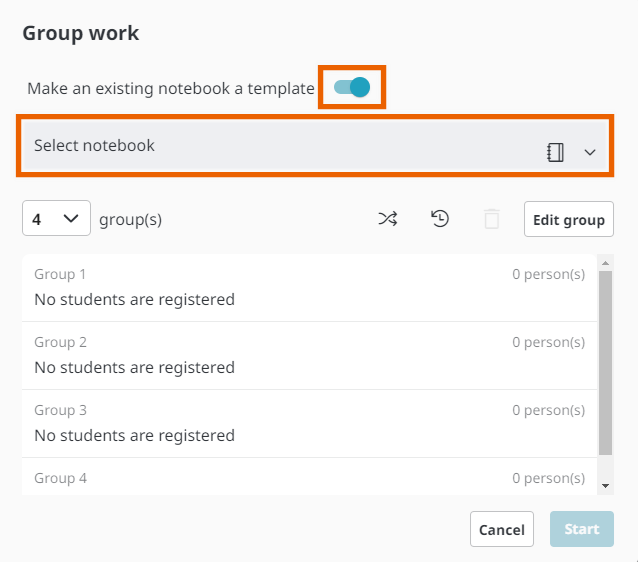
- Select a notebook you want to use as a template and select [Select].
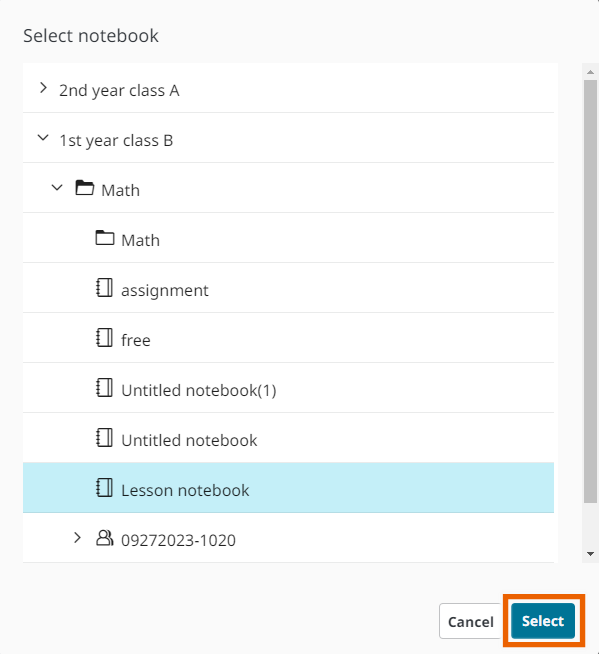
The selected notebook name is displayed in the group work dialog.
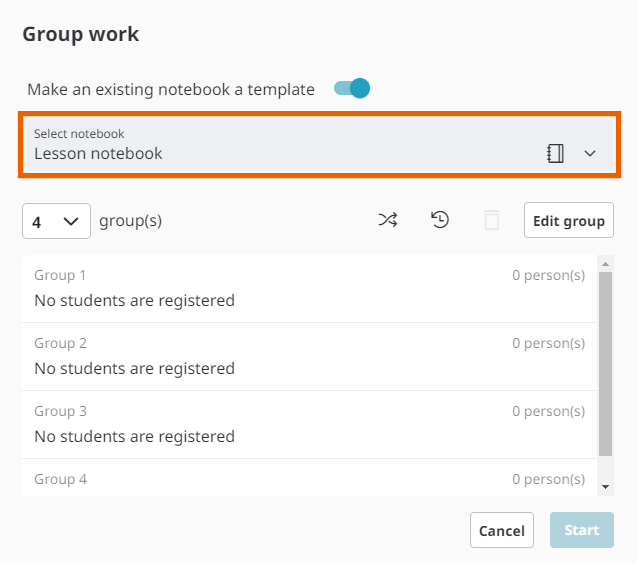
The subsequent procedure (specifying the number of groups and allocating students) is the same as that in “Creating Group Work“.
- Creating from the Menu in an Existing Notebook
- Select options in a notebook you want to use as a template and select [Group work].
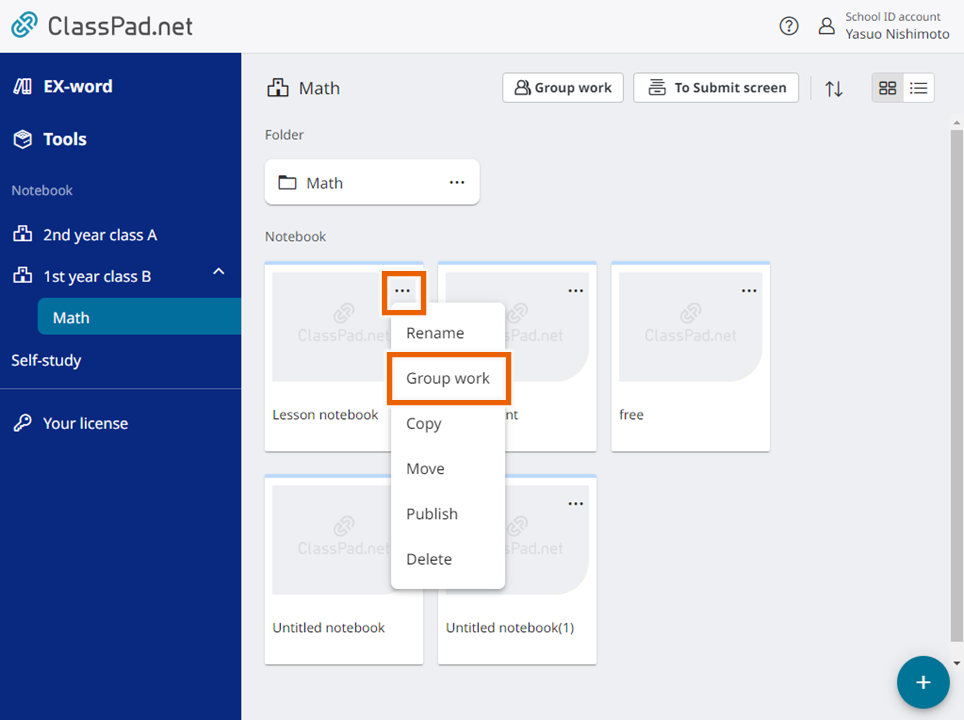
The selected notebook name is displayed in the group work dialog.

The subsequent procedure (specifying the number of groups and allocating students) is the same as that in “Creating Group Work“.
MEMO
[Group work] is not available in the menu of notebooks under [Self-study].
If you want to use a notebook saved under [Self-study] as a template, create a notebook from the group work screen.
Stopping/Starting Sharing Group Work
To stop sharing group work, select [Stop all sharing].
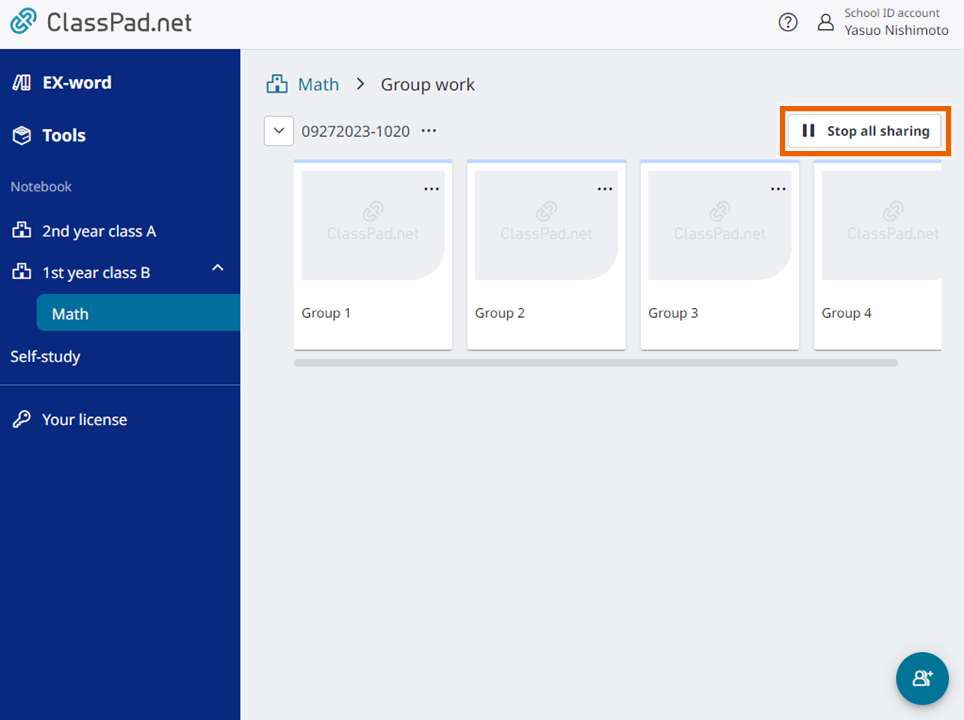
The status for sharing is now “Stopped”.
In the students’ group work screen, the folders and notebooks are hidden and inaccessible.
To resume stopped sharing, select [Start sharing].
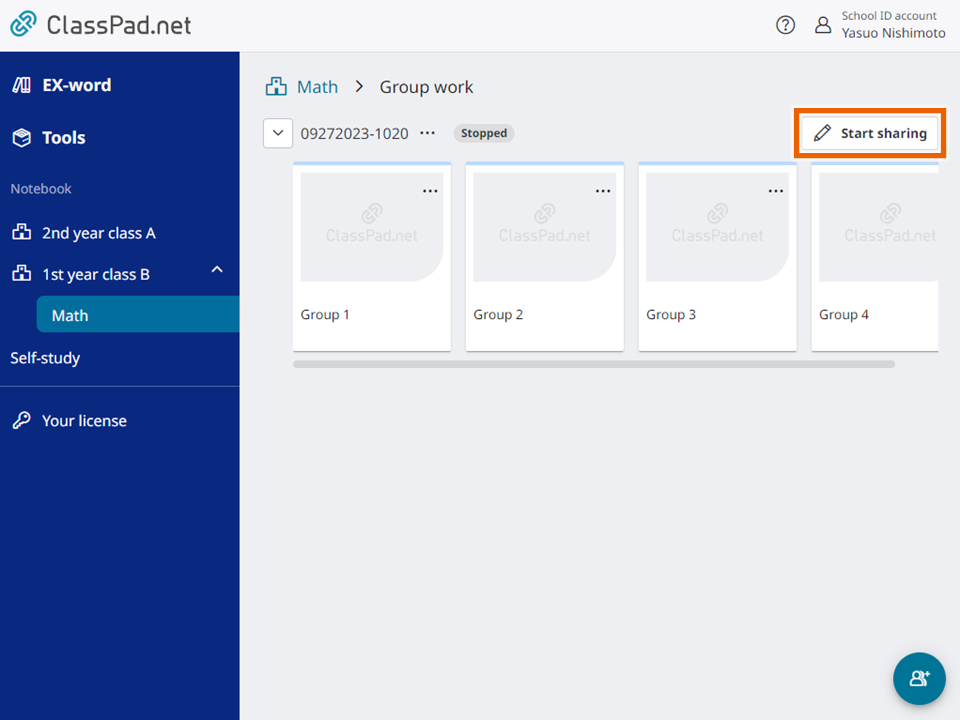
Organizing Folders/Notebooks
You can rename or delete folders/notebooks in group work.
MEMO
You cannot rename or delete shared folders/notebooks in group work.
Stop sharing before performing this.
- Renaming Folders
- Select options of the folder you want to rename and then select [Rename].
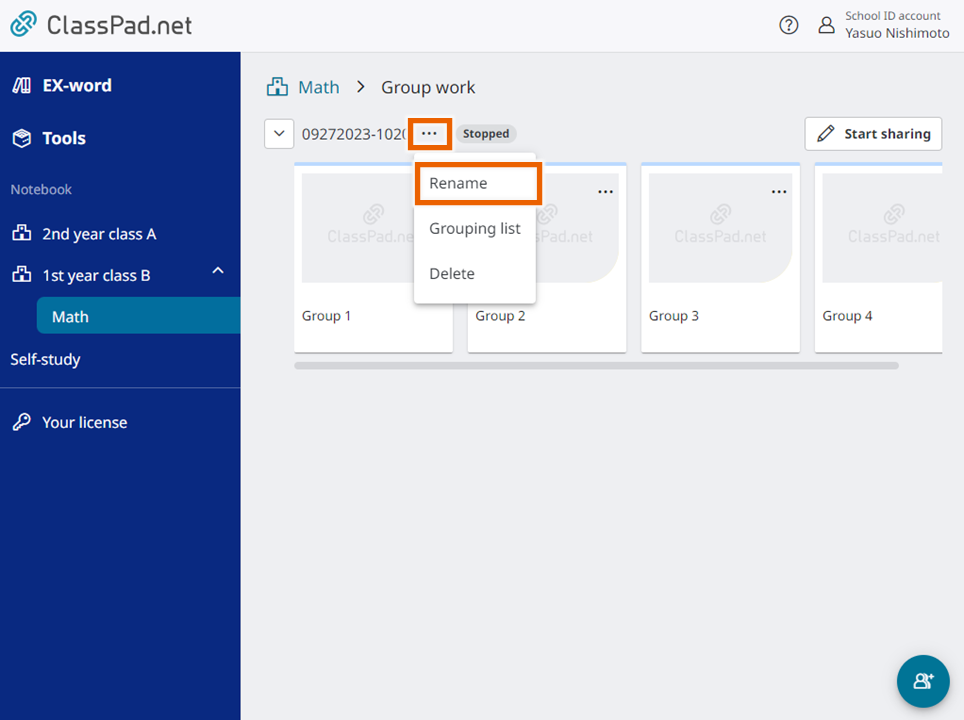
- Enter the folder name and select [Change].
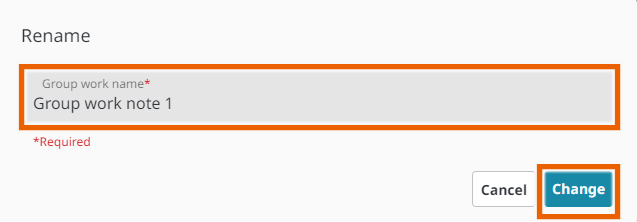
The folder name is changed.
MEMO
The following characters cannot be used in a folder name:
/ : * ? ” < > | \
- Deleting Folders
- Select options of the folder you want to delete and then select [Delete].
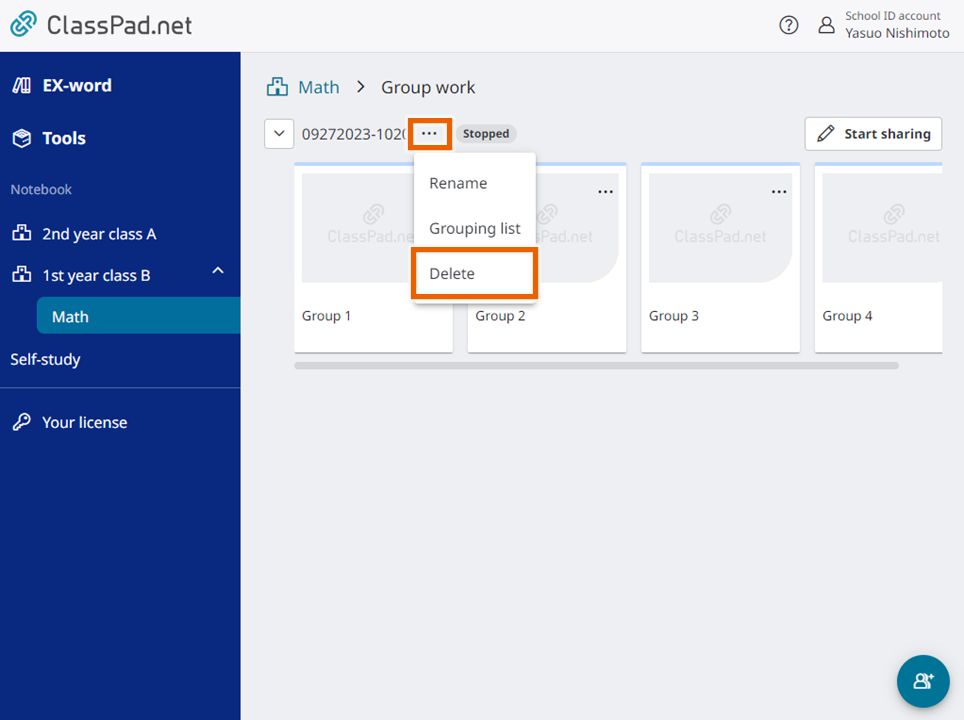
- Select [Delete].

The folder is deleted.
MEMO
For information on how to rename or delete notebooks, see “Organizing Notebooks/Folders“.
Displaying the Grouping List
- Select options of the folder you want to delete and then select [Grouping list].
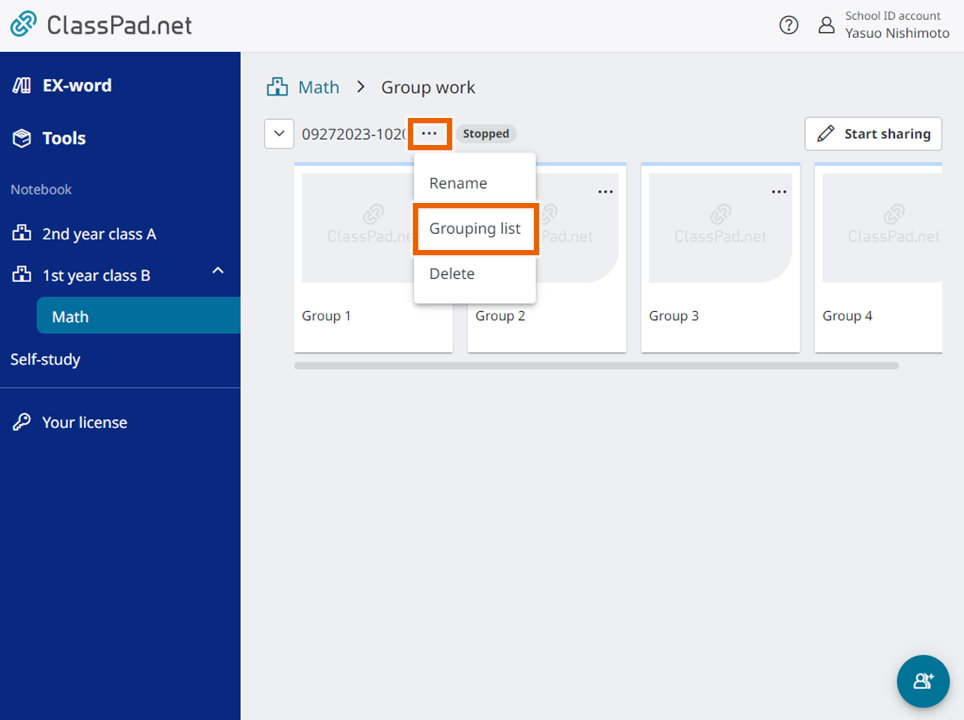
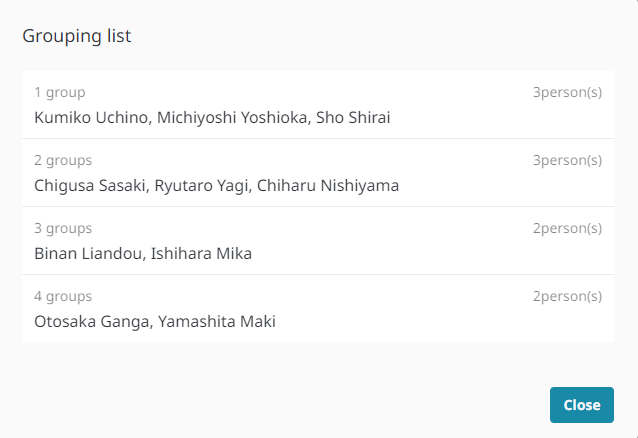
The grouping list is displayed.
