You can publish a notebook to make it available to other users.
You can also download other users’ notebooks.
table of contents
Publishing notebooks from the self-study screen
Publishing from the lesson screen
Publishing from the notebook screen
Downloading Other Users’ Notebooks
Checking the notebook publishing history
Publishing notebooks from the self-study screen
- Select options for the notebook you want to publish and then select [Publish].
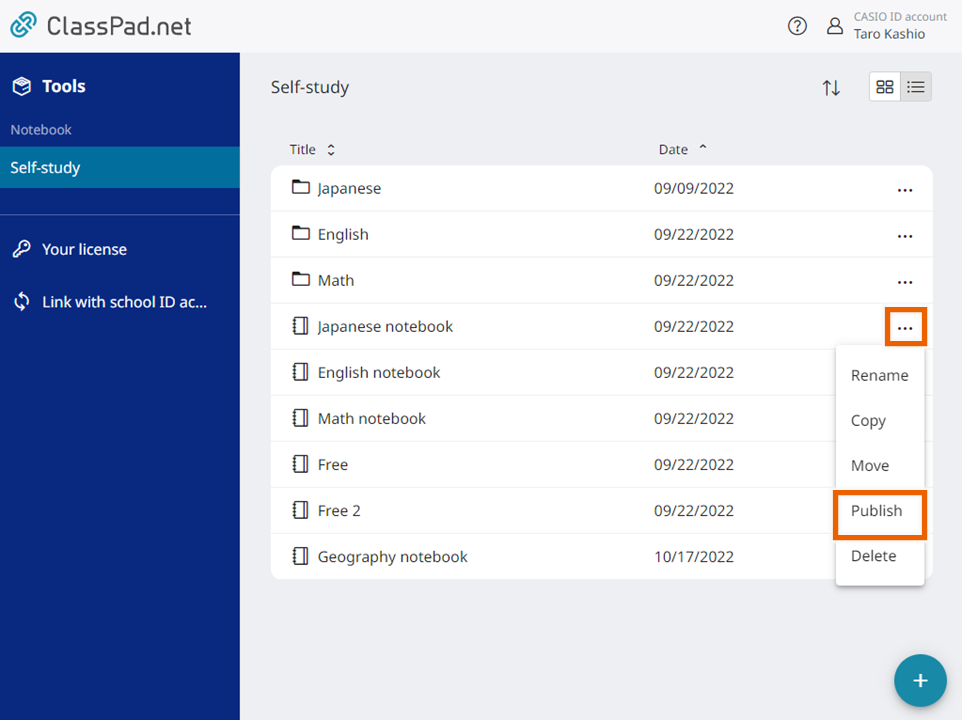
This displays a public URL for the notebook. - Select
 .
.
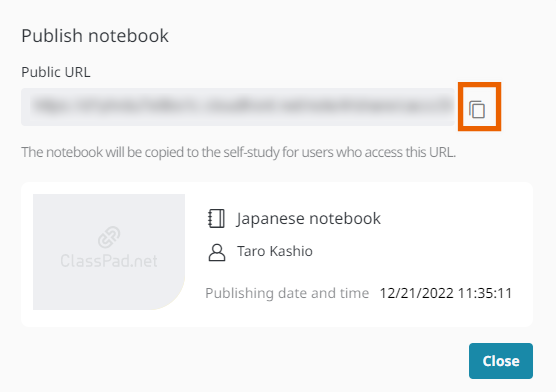
This copies the public URL to the clipboard. - Paste the public URL into an email or text message and send (publicly share) it with other users.
MEMO
The notebook publicly shared is the version current when you send the email or message. Any subsequent changes to the notebook will not be reflected in the published version.
Publishing from the lesson screen
- Select the lesson screen and select [Publish] from options for the notebook you want to publish.
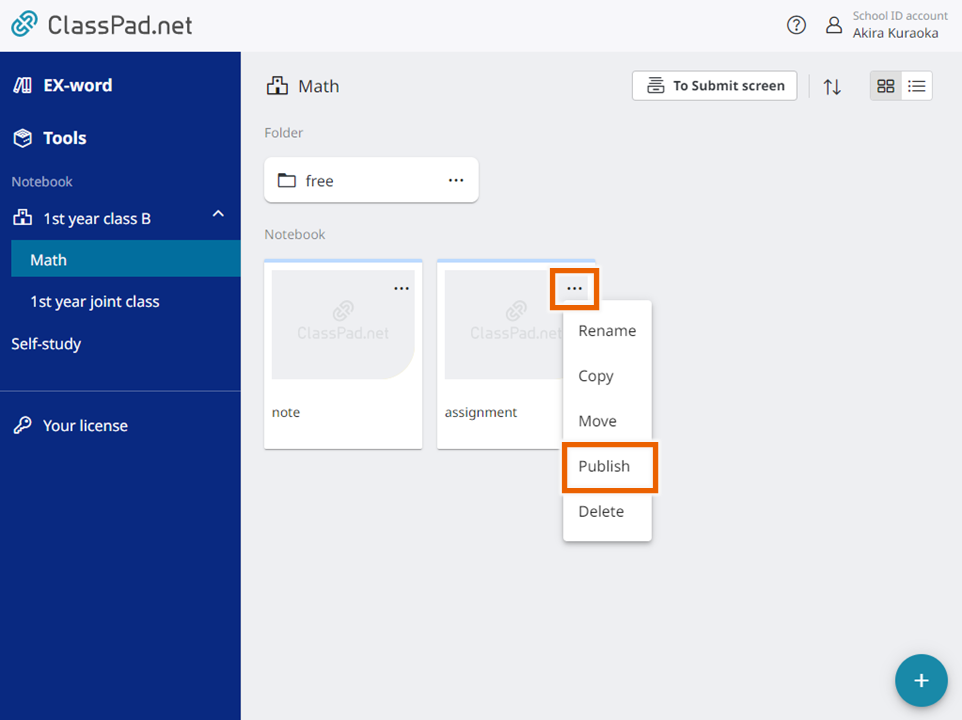
This displays a public URL for the notebook.
The subsequent procedures are the same as steps 2 and 3 in “Publishing notebooks from the self-study screen“.
Publishing from the notebook screen
- Select the screen of a notebook you want to publish and select [Publish] from options at the upper right.
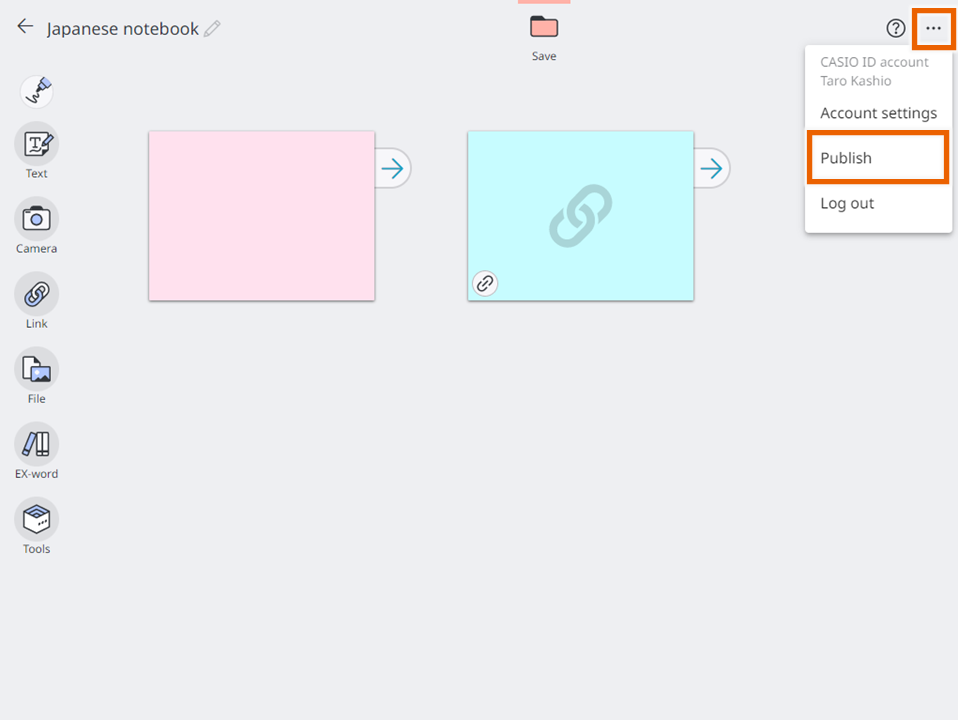
This displays a public URL for the notebook.
The subsequent procedures are the same as steps 2 and 3 in “Publishing notebooks from the self-study screen“.
Downloading Other Users’ Notebooks
- Open the public URL sent to you by another user via email or text message.
- Select [Select destination folder].
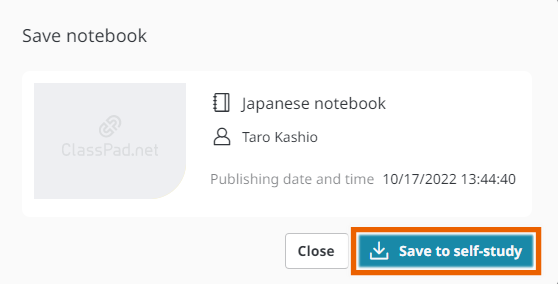
This downloads the notebook and opens the Notebook screen. - Specify the folder where you want to save the notebook and select [Select].
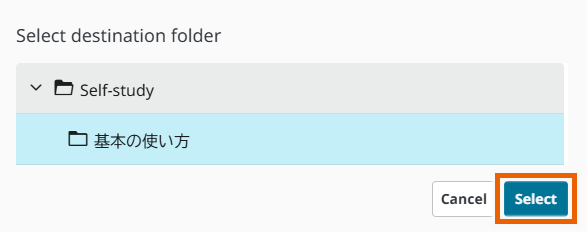
MEMO
You can save the received notebook in Self-study folder or the folder of the lessons you are registering for. - Select [Save].
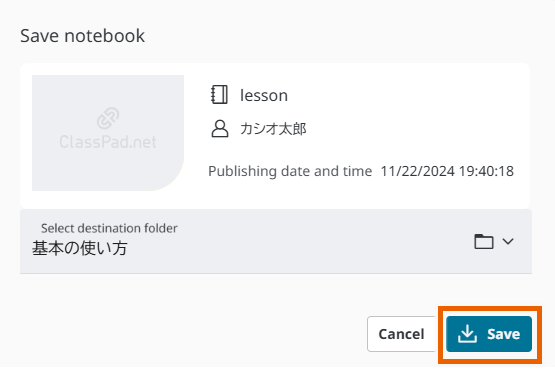
The notebook will be downloaded and open.
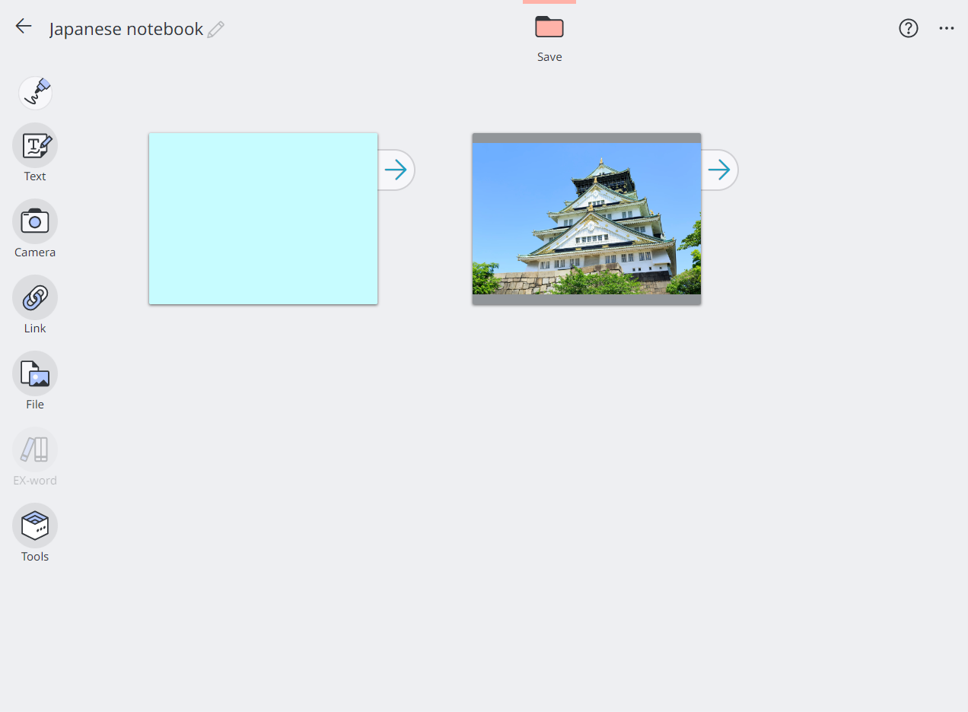
MEMO
If you have not logged in to ClassPad.net, the login screen appears. Enter your login information. The Notebook screen opens after you log in.
Users who do not have a ClassPad.net account cannot open the notebook, even via the public URL.
The received notebook is saved in “Self-study”.
If you do not have any licenses of EX-word/Tools and receive a notebook that includes EX-word/Tools sticky notes, the EX-word/Tools sticky notes appear as icons and cannot be used. In this situation, register for EX-word/Tools licenses and then download the notebook again. You will then be able to use the EX-word/Tools sticky notes.
Checking the notebook publishing history
Use this procedure to check the notebook publishing history and URL information.
- Select [Publishing history].
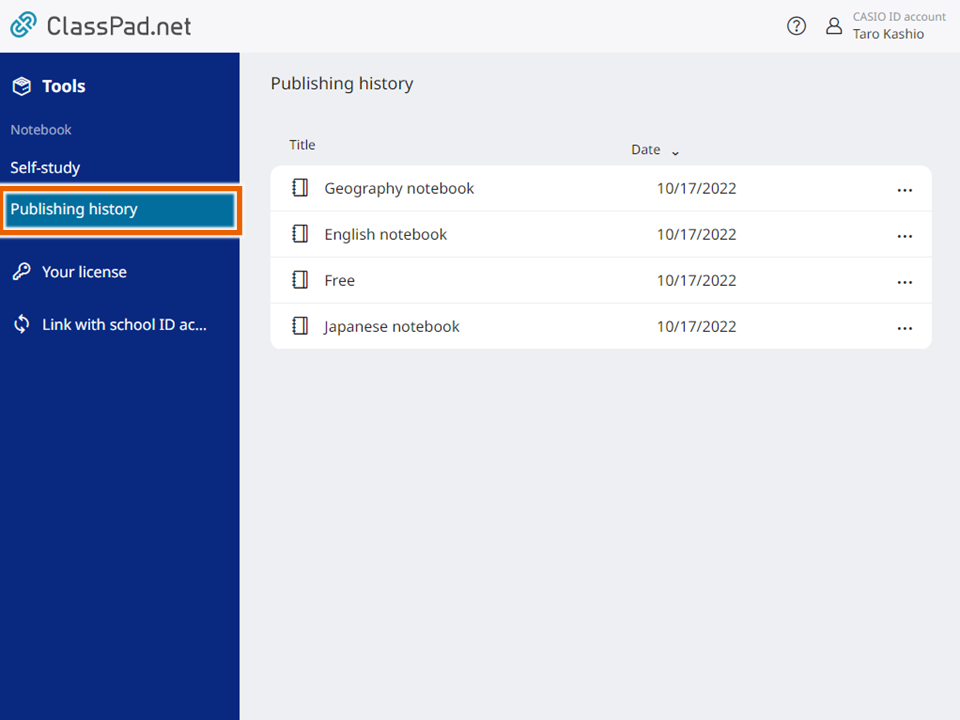
This displays the notebook’s publishing history. - Select options for the record you want to check and then select [View URL].
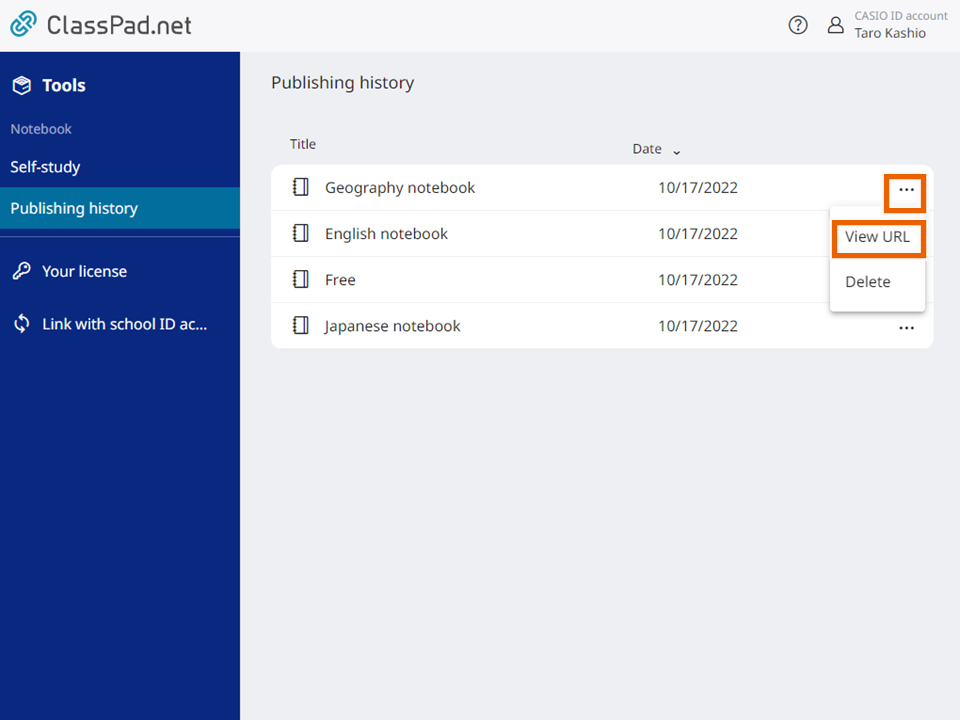
The allows you to check the notebook’s public URL and the date and time it was published.
In this screen, selecting allows you to copy the public URL to the clipboard.
MEMO
You cannot open a notebook from the [Publishing history] screen.
Use the procedure below to delete a publishing history record.
① Select options for the record you want to delete and then select [Delete].
② Select [Delete].